
In this blog, you will be guided through the process of creating a signature pad in an Angular project using the signature pad package. We shall cover all the essential steps required to accomplish this task, allowing you to follow along at your own pace.
Before delving into the implementation, let us explore the reasons behind incorporating a signature pad in our applications.
Using signature pads in projects provides a digital and streamlined approach to capture signatures, ensure authenticity, efficiency, accuracy, and compliance. They offer significant benefits in terms of legal validity, convenience, error reduction, audit trail management, cost savings, environmental sustainability, and integration possibilities.
Use case
Here are some examples of industries and scenarios where signature pads are commonly used:
- Financial Institutions
- Healthcare
- Logistics and Delivery Services
- Human Resources and Employee Management
- Legal and Law Firms
- Government and Public Administration
- Education and Academic Institutions
- Real Estate
These are just a few examples, and signature pads can be relevant in numerous other industries and scenarios where capturing digital signatures is essential for authentication, compliance, and efficiency.
Benefits of Using Signature pad(npm package) in Angular
The signature pad is a popular JavaScript library that provides a simple and intuitive way to capture signatures digitally in web applications. It offers several key features that make it a suitable choice for implementing a signature pad in an Angular project:
- Compatibility with Angular
- Responsive and Cross-browser Support
- Touch and Pointer Events Support
- Customization Options
- Data Output and Integration
The signature pad npm package is known for its simplicity and ease of use. Let’s dive into the implementation details and start creating our Signature Pad in Angular. We’ll explore the necessary steps and code snippets to accomplish this task. By following along, you’ll gain a solid understanding of how to integrate a Signature Pad into your Angular application effectively. So, let’s get started with the exciting journey of bringing the power of digital signatures to your project 🖋️🖋️🖋️.
Step 1: Creating a new Angular Project
The first step is to create a new Angular Project using the Angular CLI.
ng new pdf-viewer
To run the application, Move to your project location and run the following command:
ng serve (OR) ng s
Step 2: Installing the signature Pad Package
Install the signature_pad package from the npm package manager using the following command:
npm i signature_pad (OR) sudo npm i signature_pad
Step 3: Creating The Signature Pad Component
The next step is to create a separate shared component for the signature pad, so we can easily reuse it in any other components. So let’s get started with generating the signature pad component using the Angular CLI.
- Create a signature pad component using the following command:
ng generate component component/shared/signaturePad (or) ng g c component/shared/signaturePad
- The CLI creates a new folder
src/app/component/shared/signaturePad/,and generates the files of the signature Pad component. The CLI also declares the signaturePad component in the App Module for you 👍.
import { NgModule } from '@angular/core';
import { BrowserModule } from '@angular/platform-browser';
import { AppComponent } from './app.component';
import { SignaturePadComponent } from './component/shared/signature-pad/signature-pad.component';
@NgModule({
  declarations: [
    AppComponent,
    SignaturePadComponent
  ],
  imports: [
    BrowserModule
  ],
  providers: [],
  bootstrap: [AppComponent]
})
export class AppModule { }
- Then move to the app component and use the signature pad component in the
app.component.tsas you see below:
<app-signature-pad></app-signature-pad>
Now that our signature-pad component is created, If you see signature-pad works! in your output screen, then you are good to go 👏
Step 4: Implementation of signature Pad
We can now make use of these signature pad modules by importing them insignature-pad.component.ts and invoking them with signature_pad module.
import SignaturePad from 'signature_pad';
Then declare these necessary variables:
- SignatureNeeded → For validating the signature
- SignaturePad →It is used to create an instance of the
SignaturePadclass in your component. It represents the signature pad element on which you can perform operations such as capturing, clearing, or retrieving the signature. - CanvasEl → It is used to obtain a reference to a HTML canvas element with the template reference variable name
'canvas'. - signatureImg → To store the submitted signature as base64
signatureNeeded!: boolean;
  signaturePad!: SignaturePad;
  @ViewChild('canvas') canvasEl!: ElementRef;
  signatureImg!: string;
Then, create a new function called ngAfterViewInit
Which is a lifecycle hook provided by Angular, you can access the SignaturePad instance and perform operations. This hook is called after the component’s view has been initialized. Within, you can configure the SignaturePad’s options, handle events, or manipulate the Signature Pad itself. This includes tasks like setting size, color, or behavior, attaching event listeners for signature changes, or other initialization specific to the SignaturePad library.
Then create the following functions to track the cursor for the signature
startDrawingis to perform any necessary actions when drawing startsmovedis to perform any necessary actions when the signature is being drawn
startDrawing(event: Event) {
    // works in device not in browser
 }
moved(event: Event) {
    // works in device not in browser
  }
Then, create the following function to get the signature as base64 Encoded data
savePad() {
const base64Data = this.signaturePad.toDataURL();
}
To modify the signature before the sign is submitted, you can use the inbuild function provided by the signature pad module, as below
clearPad() {
this.signaturePad.clear();
}
Great! Now, we have our functions to track the signature, saving the signature as base64Encoded and for clearing signature 😊👏
In signature-pad.component.html add the canvas element
<canvas
#canvas
(touchstart)="startDrawing($event)"
(touchmove)="moved($event)"
width="700"
height="200"
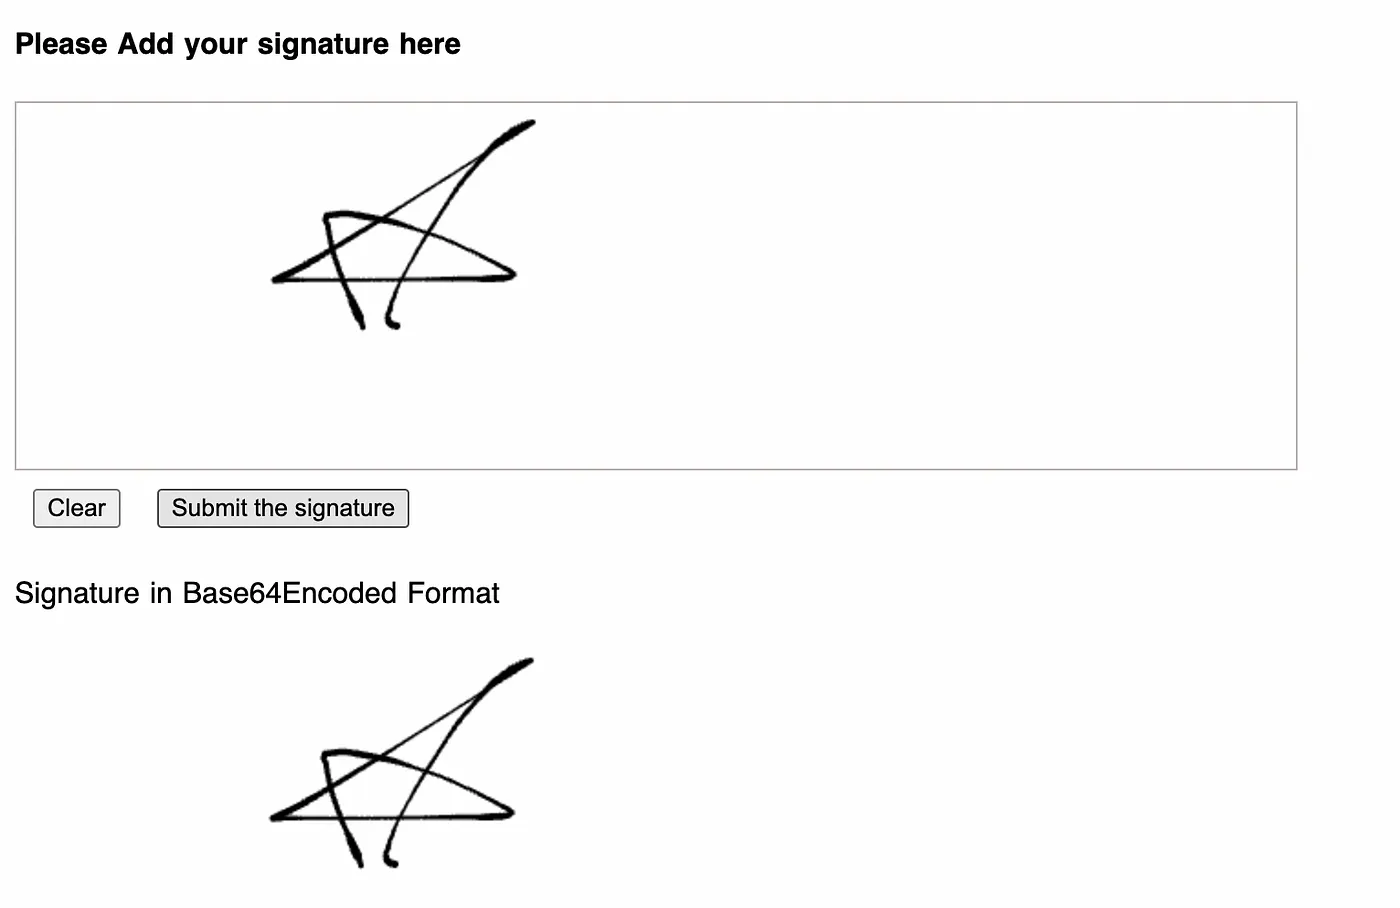
></canvas>Then create two buttons, one for clearing the signature and one for submitting the signature as base64 Encoded value.
<button (click)="clearPad()">Clear</button>
 <button (click)="savePad()">Submit the signature</button>
Step 5: Signature Validation
If you want to check whether the signature is done while submitting, you can check by calling this inbuilt function which is provided by the signature_pad module
this.signatureNeeded = this.signaturePad.isEmpty();
Note: This package primarily focuses on capturing and manipulating signatures within web applications. If you are looking for server-side signature verification techniques, you may need to explore different libraries or tools that support digital signature validation.
Code Repository: https://github.com/GanapathySubramanian/signature_pad
Demo: https://ganapathysubramanian.github.io/signature_pad/