
Introduction
In today’s world of remote communication, Amazon Chime has become a valuable tool for hosting meetings and making PSTN calls. In this blog post, we’ll walk you through how to establish the load test on Chime outbound calls using an open-source testing tool (SIPp).
Components used:
Voice Connector:
Voice over Internet Protocol (VoIP) delivers calls over the internet using the standards-based Session Initiation Protocol (SIP) of Amazon Chime Voice Connector. It provides Session Initiation Protocol (SIP) trunking service for your existing phone system.
Use cases of Voice Connector:
- Used to forward outbound calls to the existing telephony system
- Accept calls from the existing system and handle them using the Chime SMA service.
For our use case, with the help of a Voice connector, we will forward the calls to the SIPp server.
SIPp:
SIPp is a performance testing tool for the SIP protocol. SIPp is used to generate custom SIP requests and responses. Using SIPp we can mock our telephone calls.
SIPp will work in two modes.
- UAC—Initiate SIP calls.
- UAS: Accept SIP calls.
For our use case, we will use SIPp to run in UAS mode.
Instead of making calls to real telephony users, we will forward the calls to the SIPp server with the use of Voice Connector. Now SIPp will accept calls, and it will keep the call in a connected state until we hang up.
Architecture:
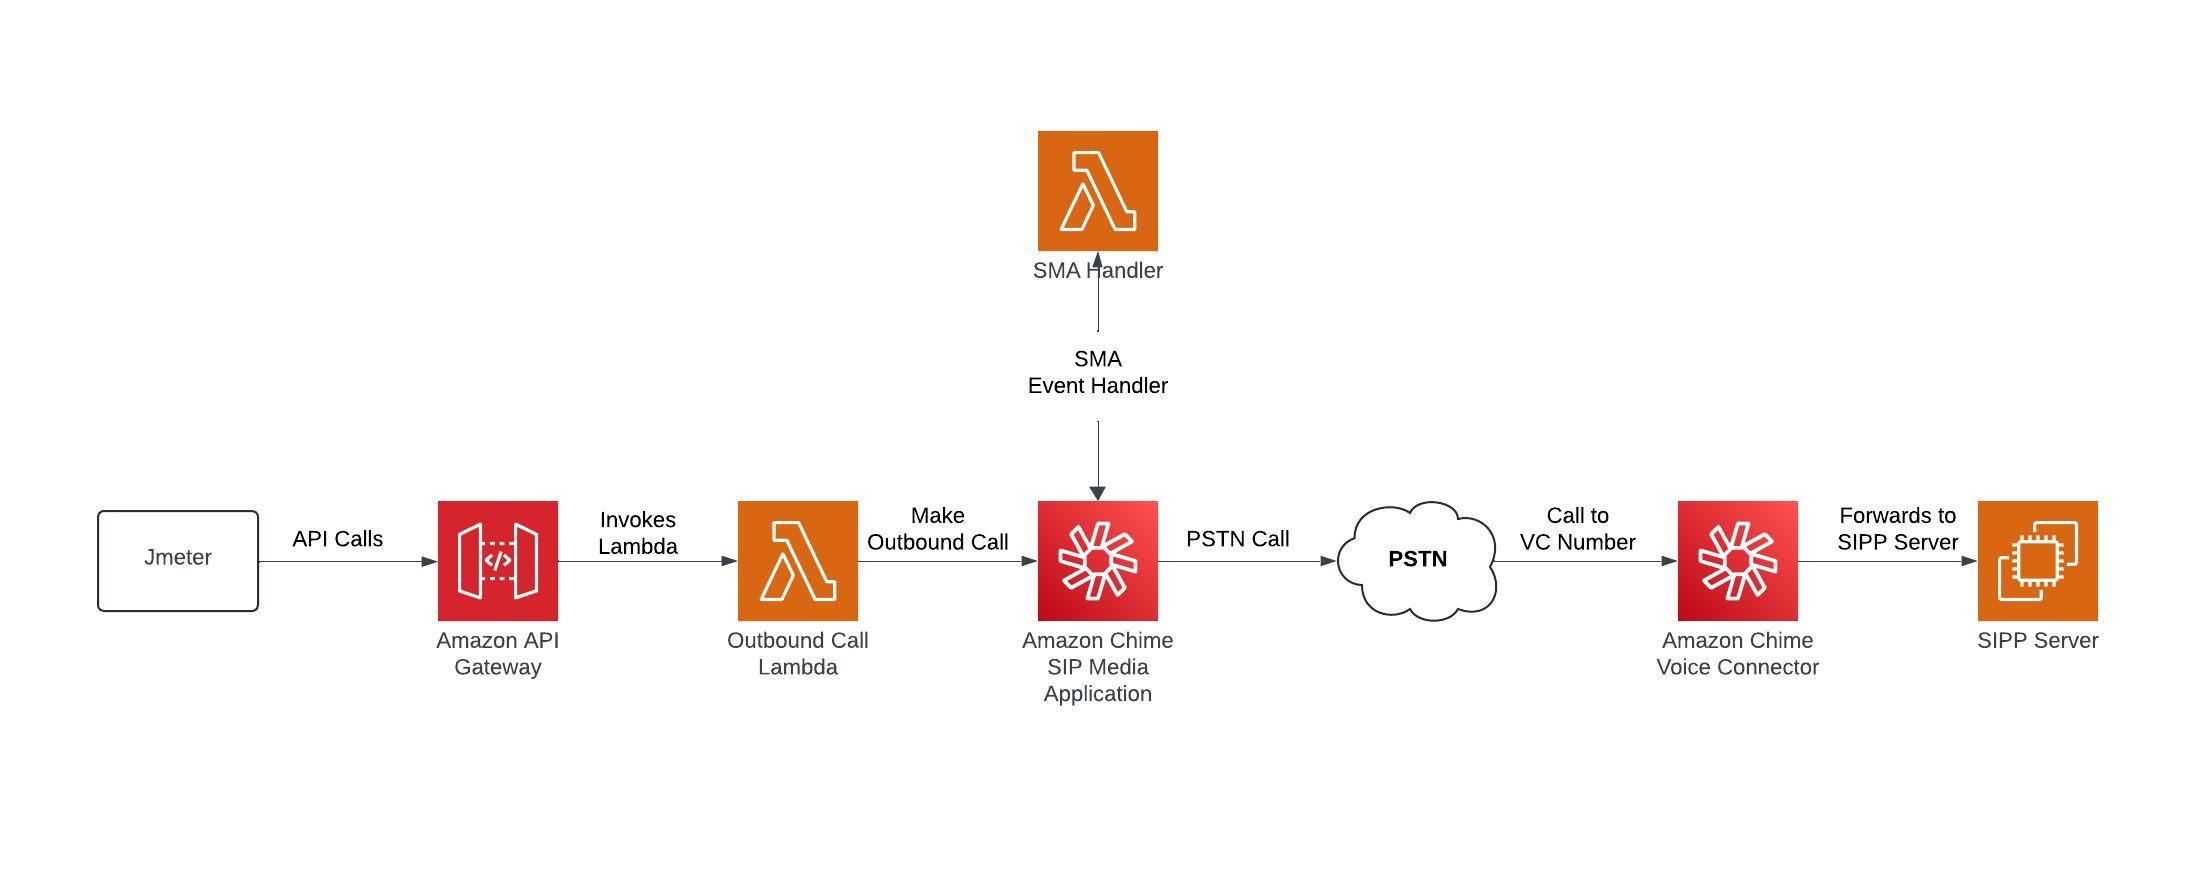
- Using JMeter, we can invoke the API with the desired load.
- Outbound Call Lambda will make the outbound call to the specified number.
- Enter the phone number associated with the voice connector in the TO_PHONE_NUMBER field.
- Finally, the SIPP server will receive the calls.
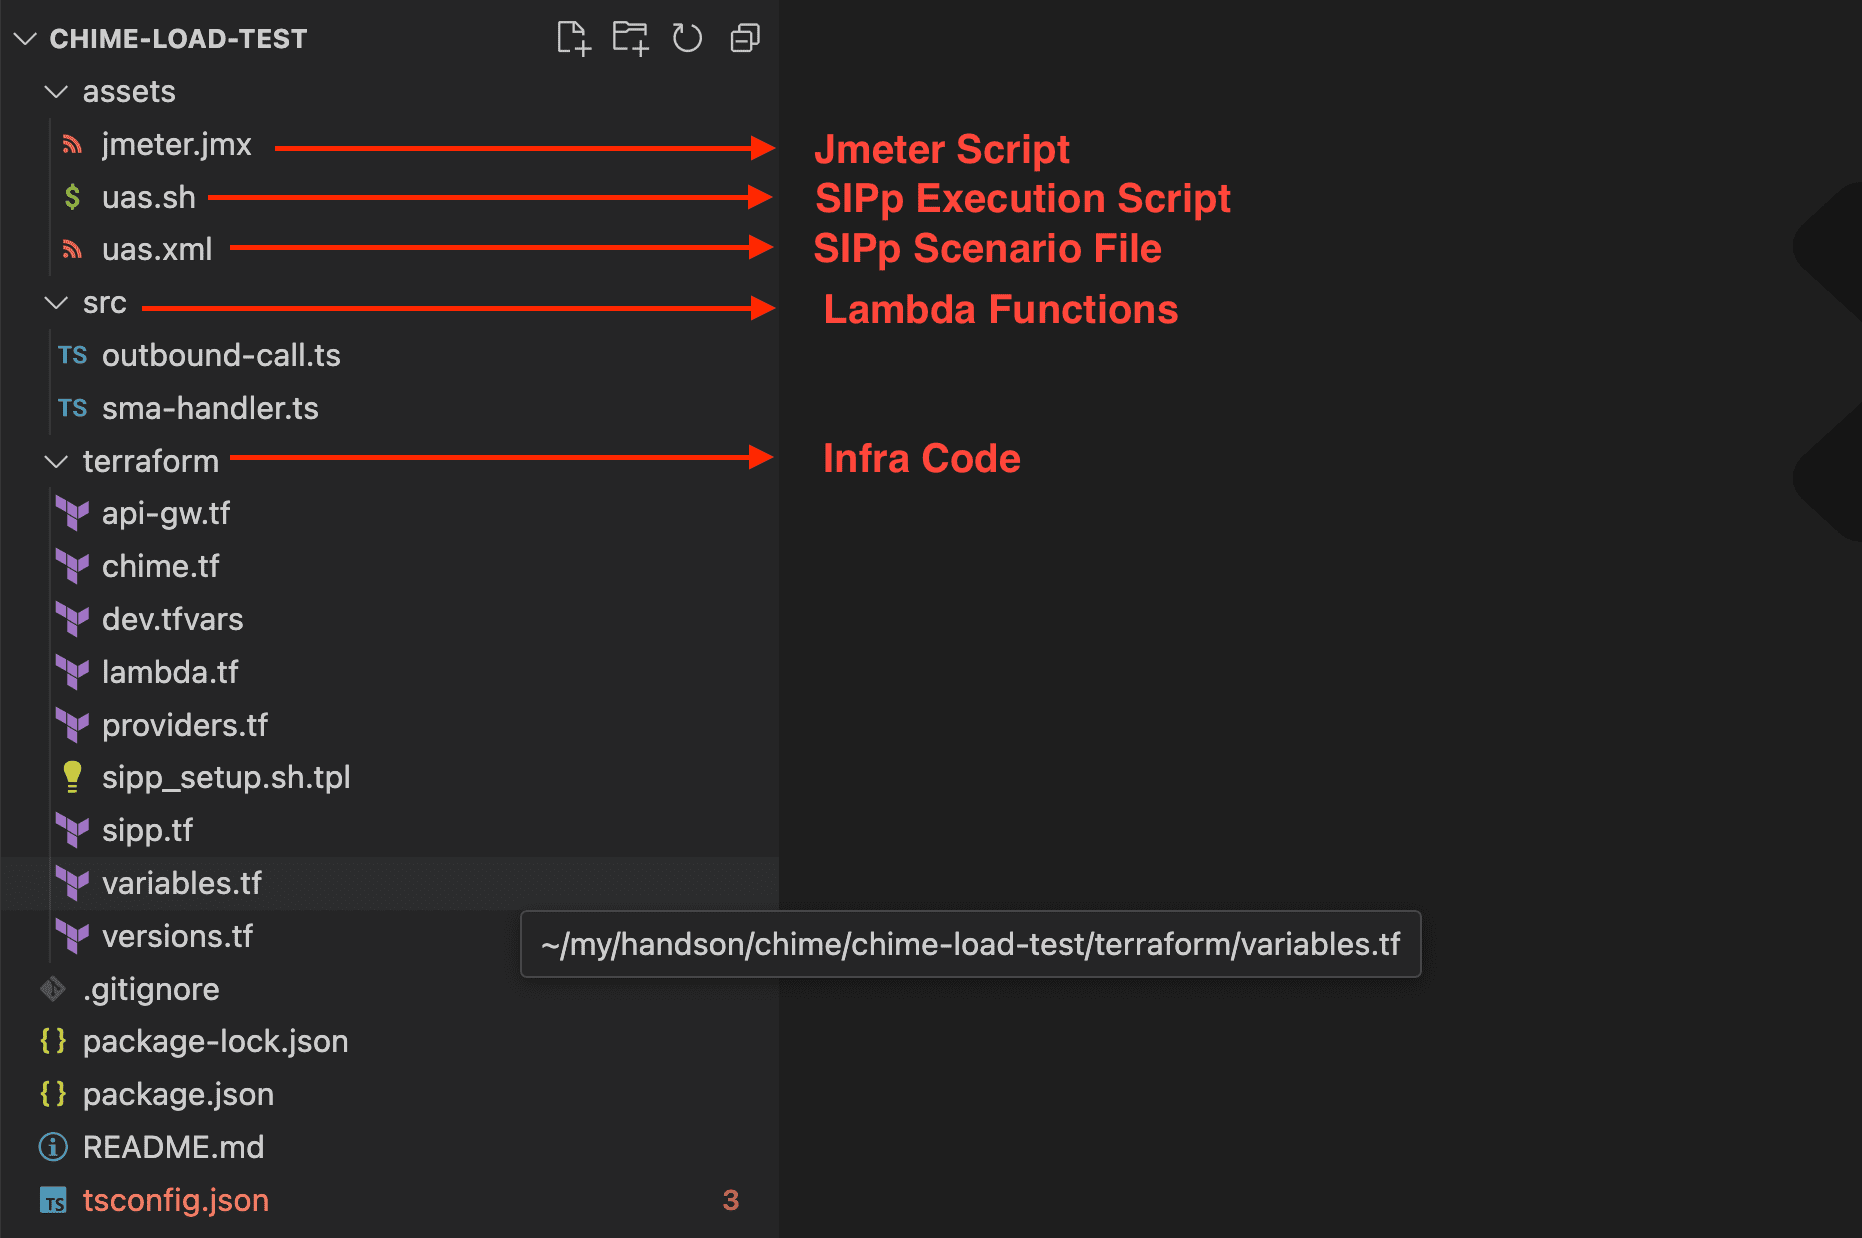
Folder Structure:
Dependencies:
- “terraform”: “v1.3.7”
- “registry.terraform.io/hashicorp/aws“: “v5.26.0”
- “registry.terraform.io/hashicorp/template”: “v2.2.0”
- “registry.terraform.io/hashicorp/tls”: “v4.0.5”
- “sipp”: “3.6.1”
- “jmeter”: “5.6.2”
- “@aws-sdk/client-chime-sdk-voice”: “^3.554.0”
Flow Implementation
Step 1: Build and Deployment
First, build the lambda function and deploy the infra using Terraform. The Readme.md file explains the steps.
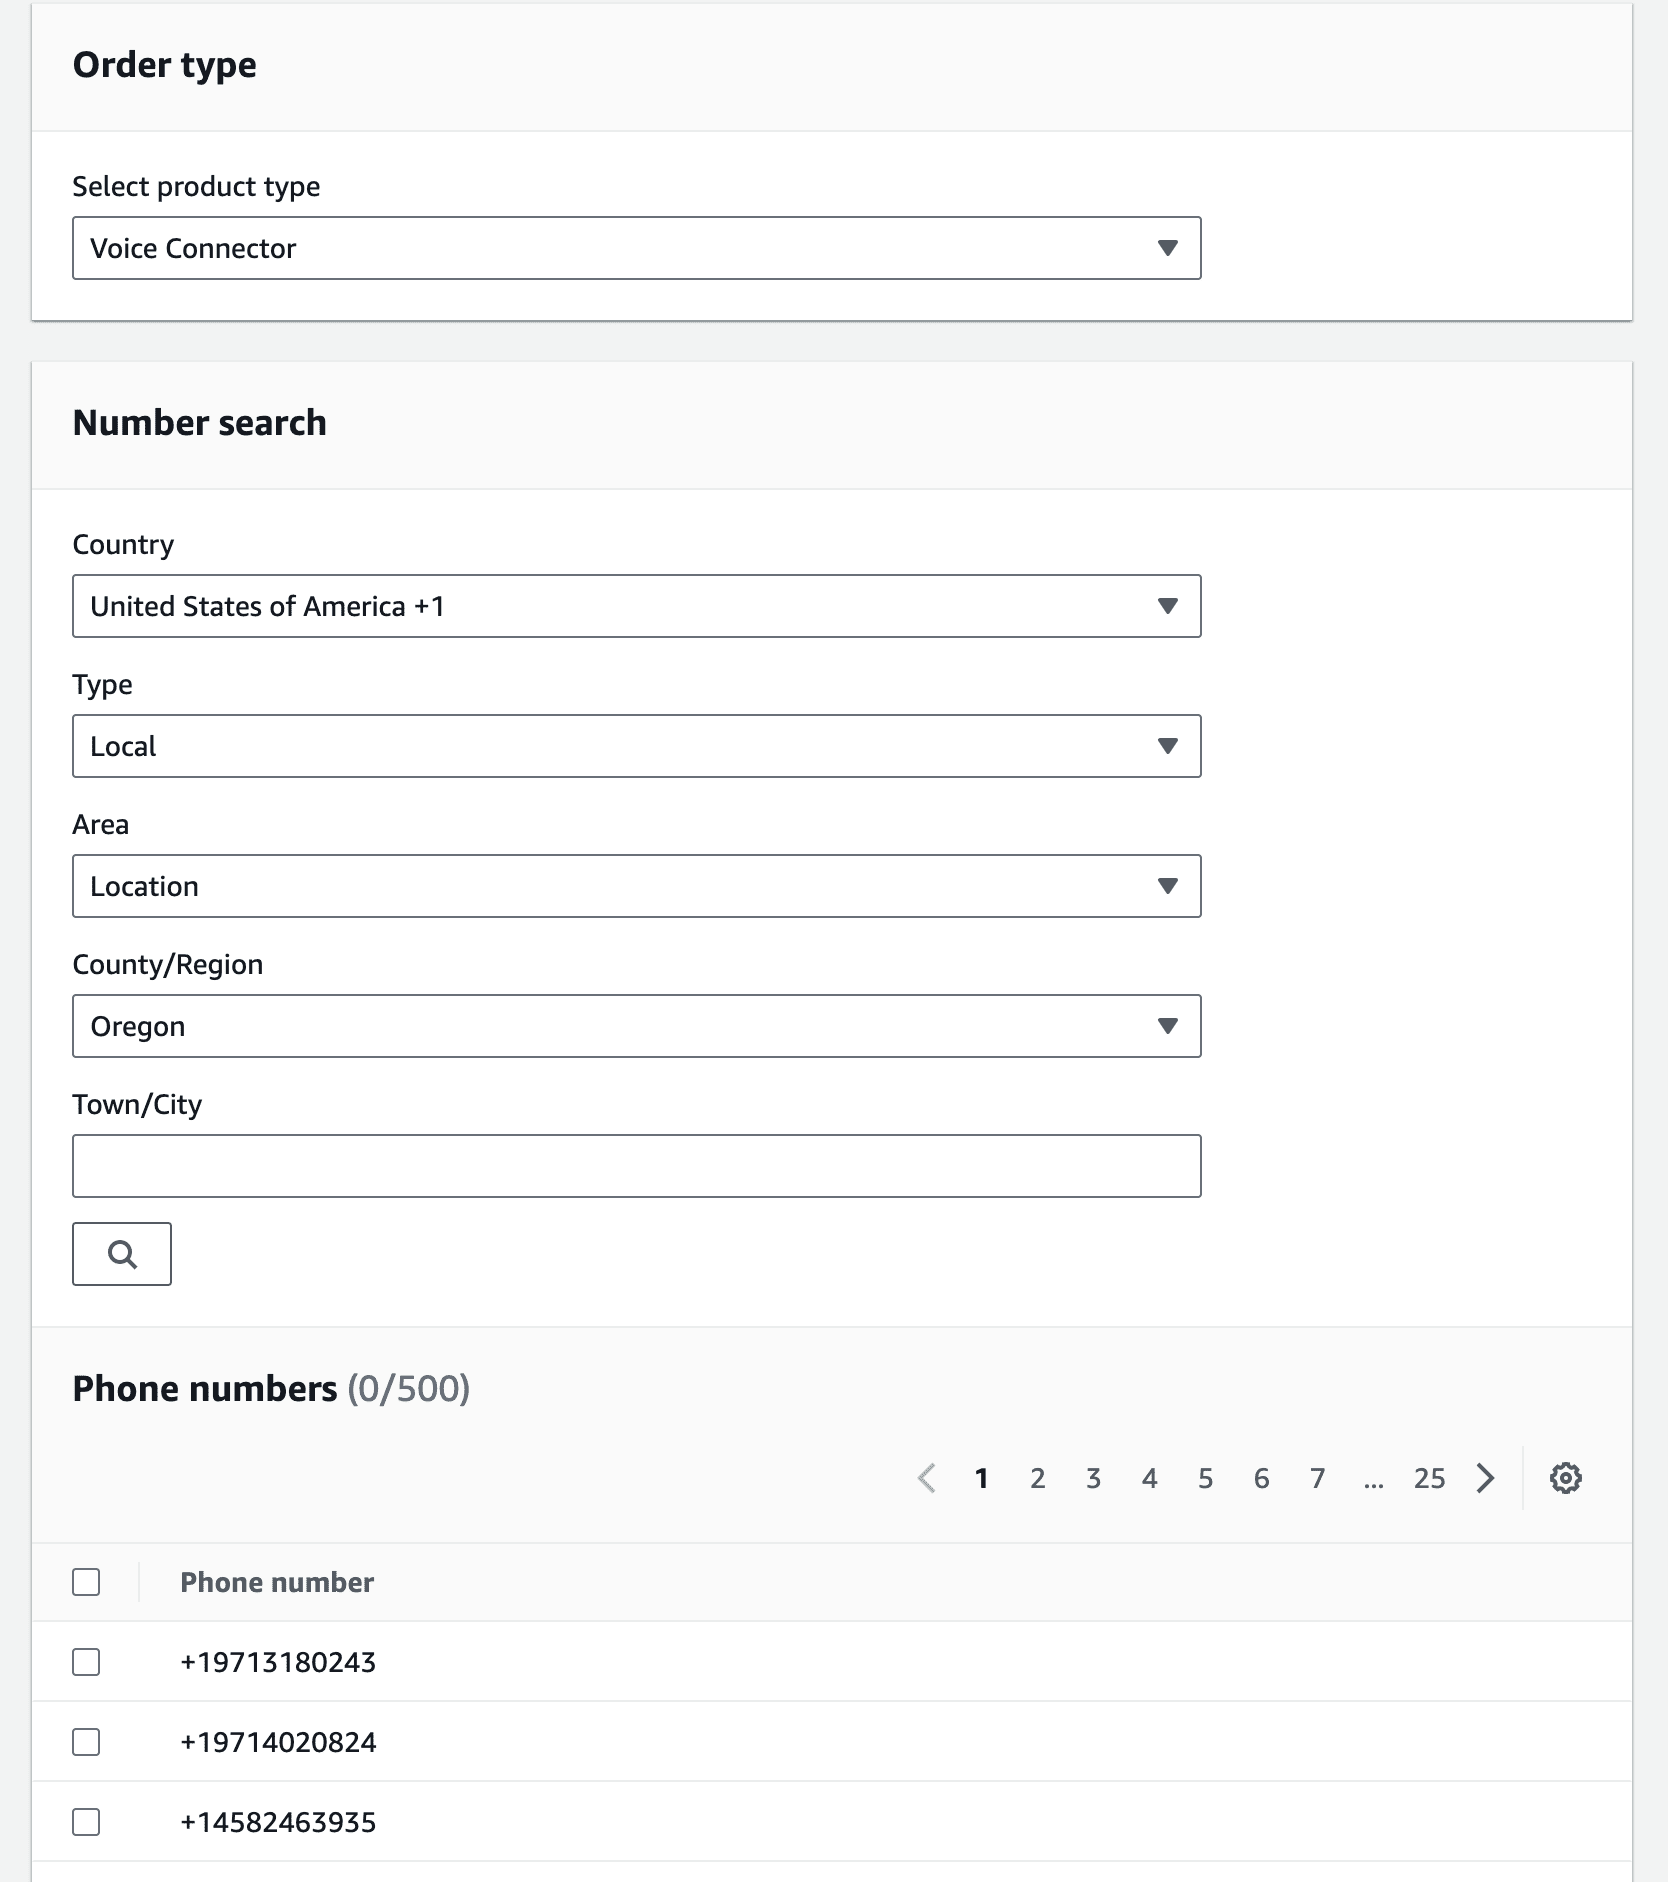
Step 2: Purchase and Assign Phone Number
- Go to Amazon Chime SDK
- Navigate to phone number management
- In orders, provide one phone number for Voice Connector.
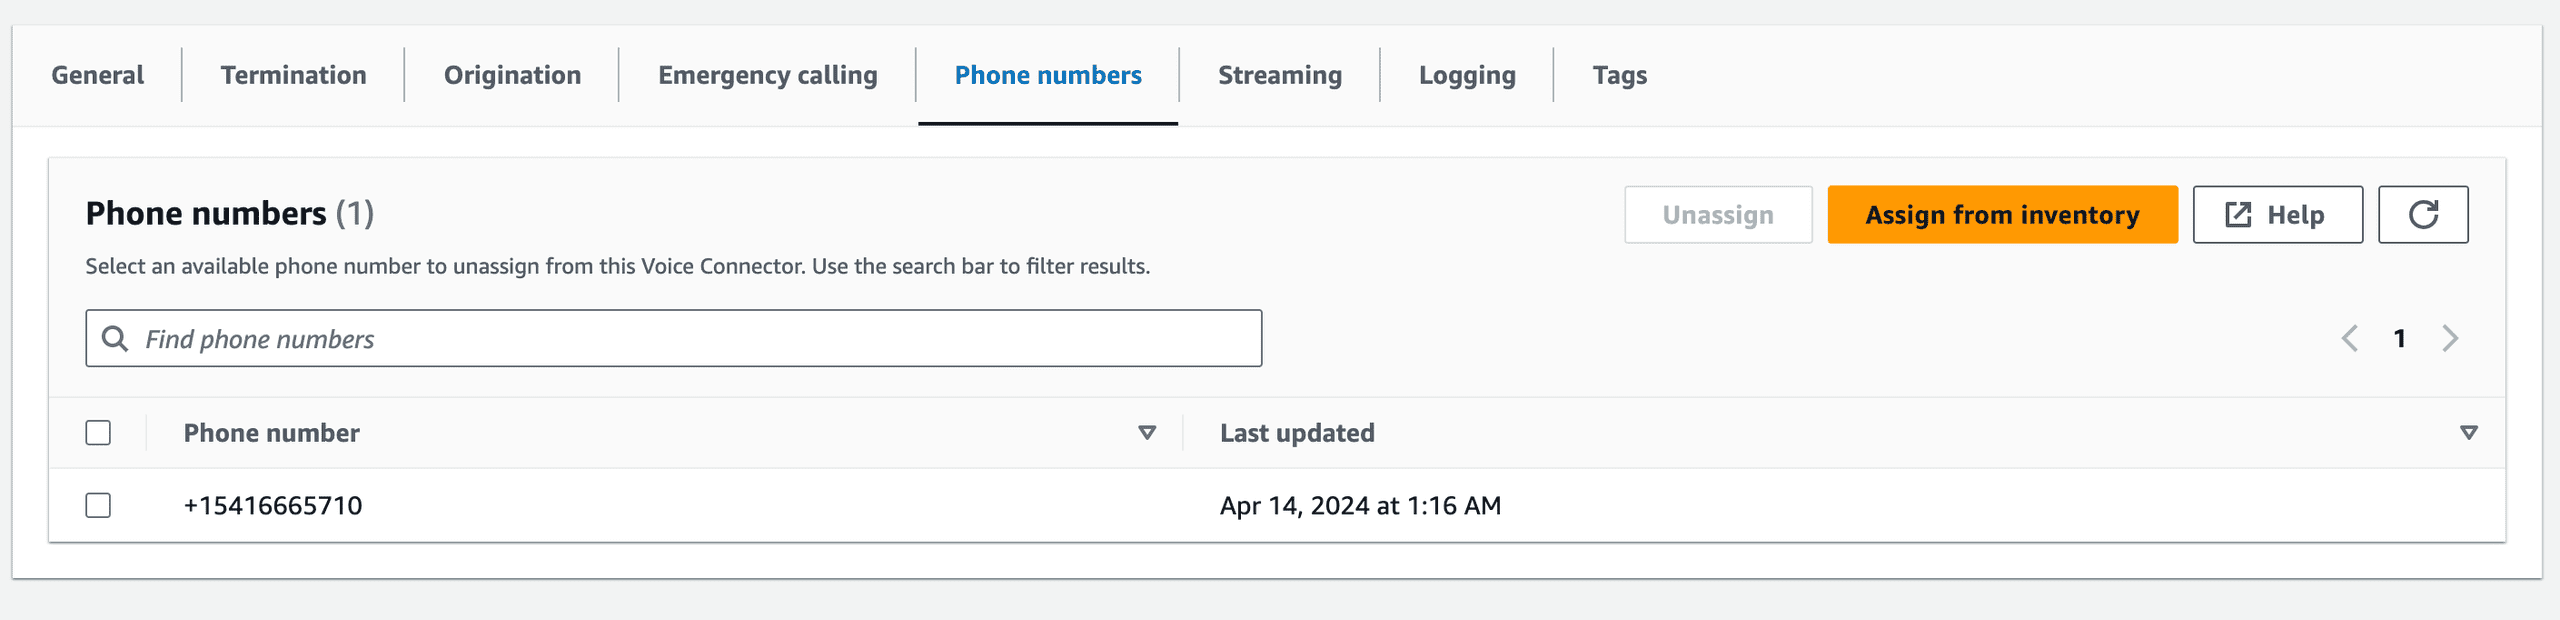
- Now navigate to Voice connectors and choose the deployed voice connector.
- Assign the purchased phone numbers to the voice connector.
- Now any calls made to this number will be routed to the SIPp server that has been configured in the origination of the Voice Connector.
Step 3: SIPp
- Log in to the SIPp server and go to the /home/ubuntu/sipp-3.6.1 directory.
- Update the SIPp public IP in the uas.sh.
- Now execute the uas.sh script; SIPp is ready to accept the calls.
Step 4: JMeter
Using JMeter, we can do a load test of our desired count. We have the JMeter script in the assets folder in our GitHub repository. The script contains a load test count of 50 calls/sec and 2500 total calls. Modify the count of your choice and start the test. We can now view the calls in the SIPp server.

Conclusion
Building a custom call flow automation system with Amazon Chime allows you to tailor your communication processes to your specific needs. By making a load test using SIPp, we can verify the scalability of Chime’s PSTN call, and our application will be production-ready to handle the loads.
Reference:
-
GitHub Repo: GitHub – prabusampath007/chime-load-test
-
Voice Connector: https://d1.awsstatic.com/whitepapers/leveraging_chime_voice_connector_for_sip_trunking.pdf
-
Provisioning phone number: Provisioning phone numbers – Amazon Chime SDK
-
Assigning Phone number to VC: Assigning and unassigning Amazon Chime SDK Voice Connector phone numbers – Amazon Chime SDK
-
SIPP: Create your own XML scenarios — SIPp 3.6 documentation
-
SIPP command line parameters: SIPp command line parameters – TD-er’s Wiki
-
SIP Protocol: Session Initiation Protocol – Introduction
