
Introduction
The Composable Architecture (TCA) is a SwiftUI architectural framework that resembles the widely used Redux in iOS development. Created by Point-Free, TCA aims to manage UI side effects and enhance state management.
TCA consists of three main components: State, Action, and Reducer. Together, these form the Store, which manipulates state variables through actions. Within the view, the Store is typically converted to a ViewStore. This conversion enables access to state variables for UI components, allows sending actions for state manipulations, and facilitates running side effects.
The Reducer returns a Reduce type that executes the Effect of actions defined in the Action enum. API calls are made asynchronously from Effect<Action>, and actions can be dispatched based on the API result.
To demonstrate how to make API calls using the TCA framework, we’ll create a sample SwiftUI project. In this project, we’ll explore how to utilize the Effect<Action> of the reducer.
Creating a Project
To create the project, use Xcode (version 15.0 or higher) and TCA version (0.59.0 to 2.0.0). You can download Xcode from the App Store or Apple’s official developer site (https://developer.apple.com/xcode/resources).
Launch Xcode and start a new project by going to File > New > Project. You’ll see a screen where you can choose a project template:
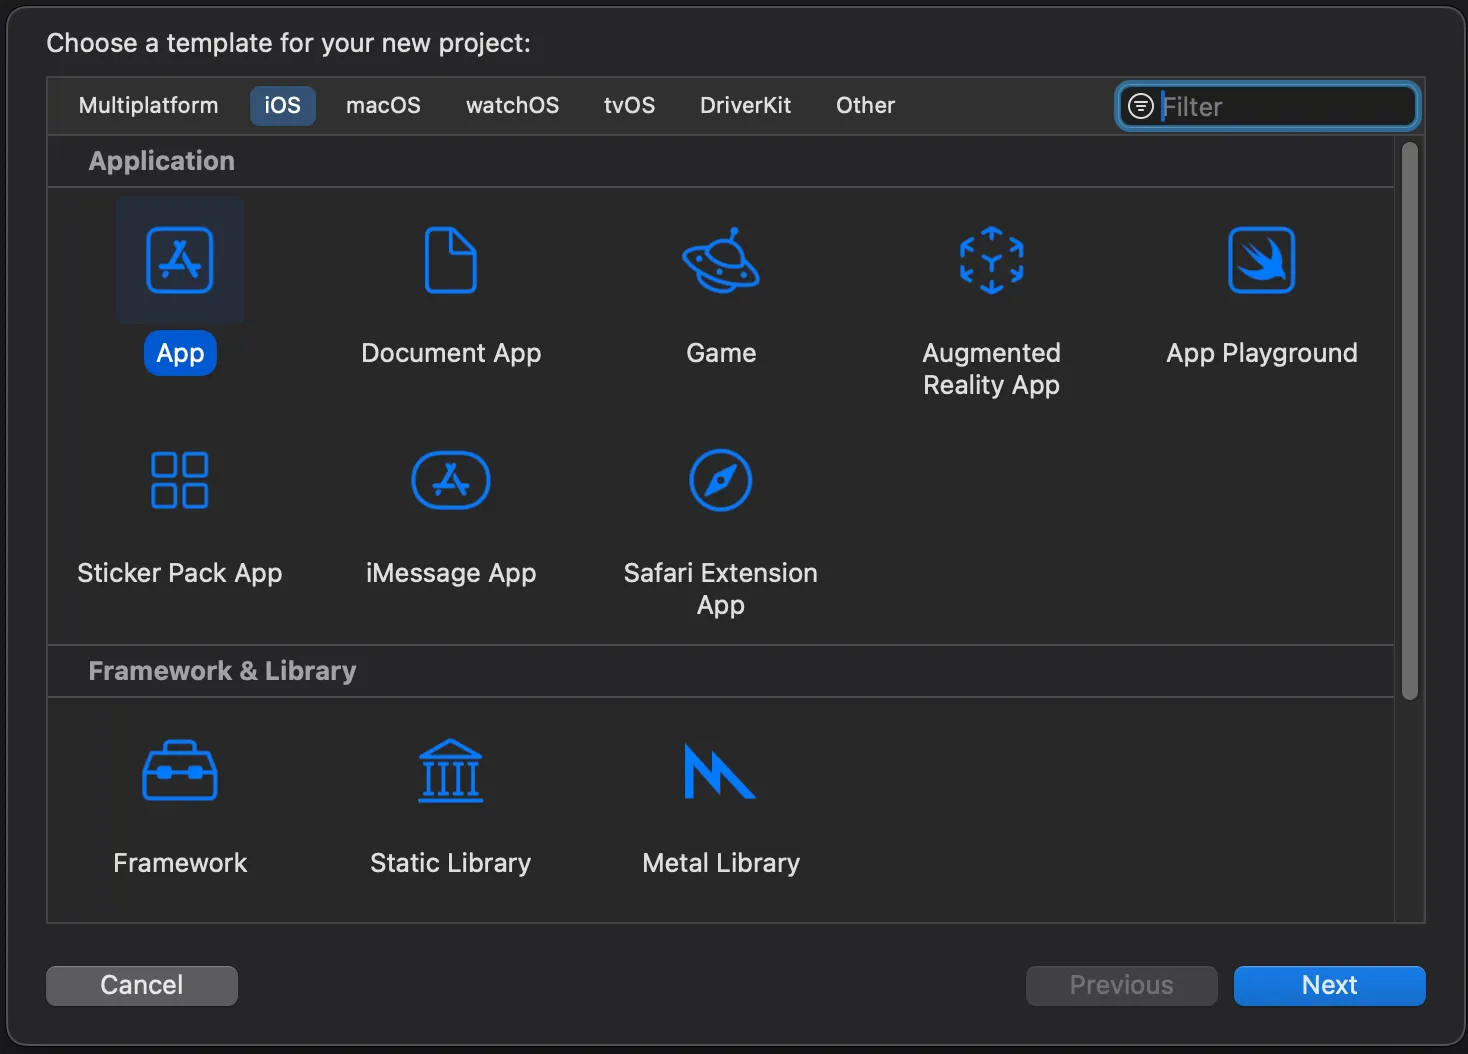
Choose the App template and name your project. For this tutorial, we’ll use APICallsWithTCA. Enter a unique organization identifier, which will serve as the Bundle Identifier.
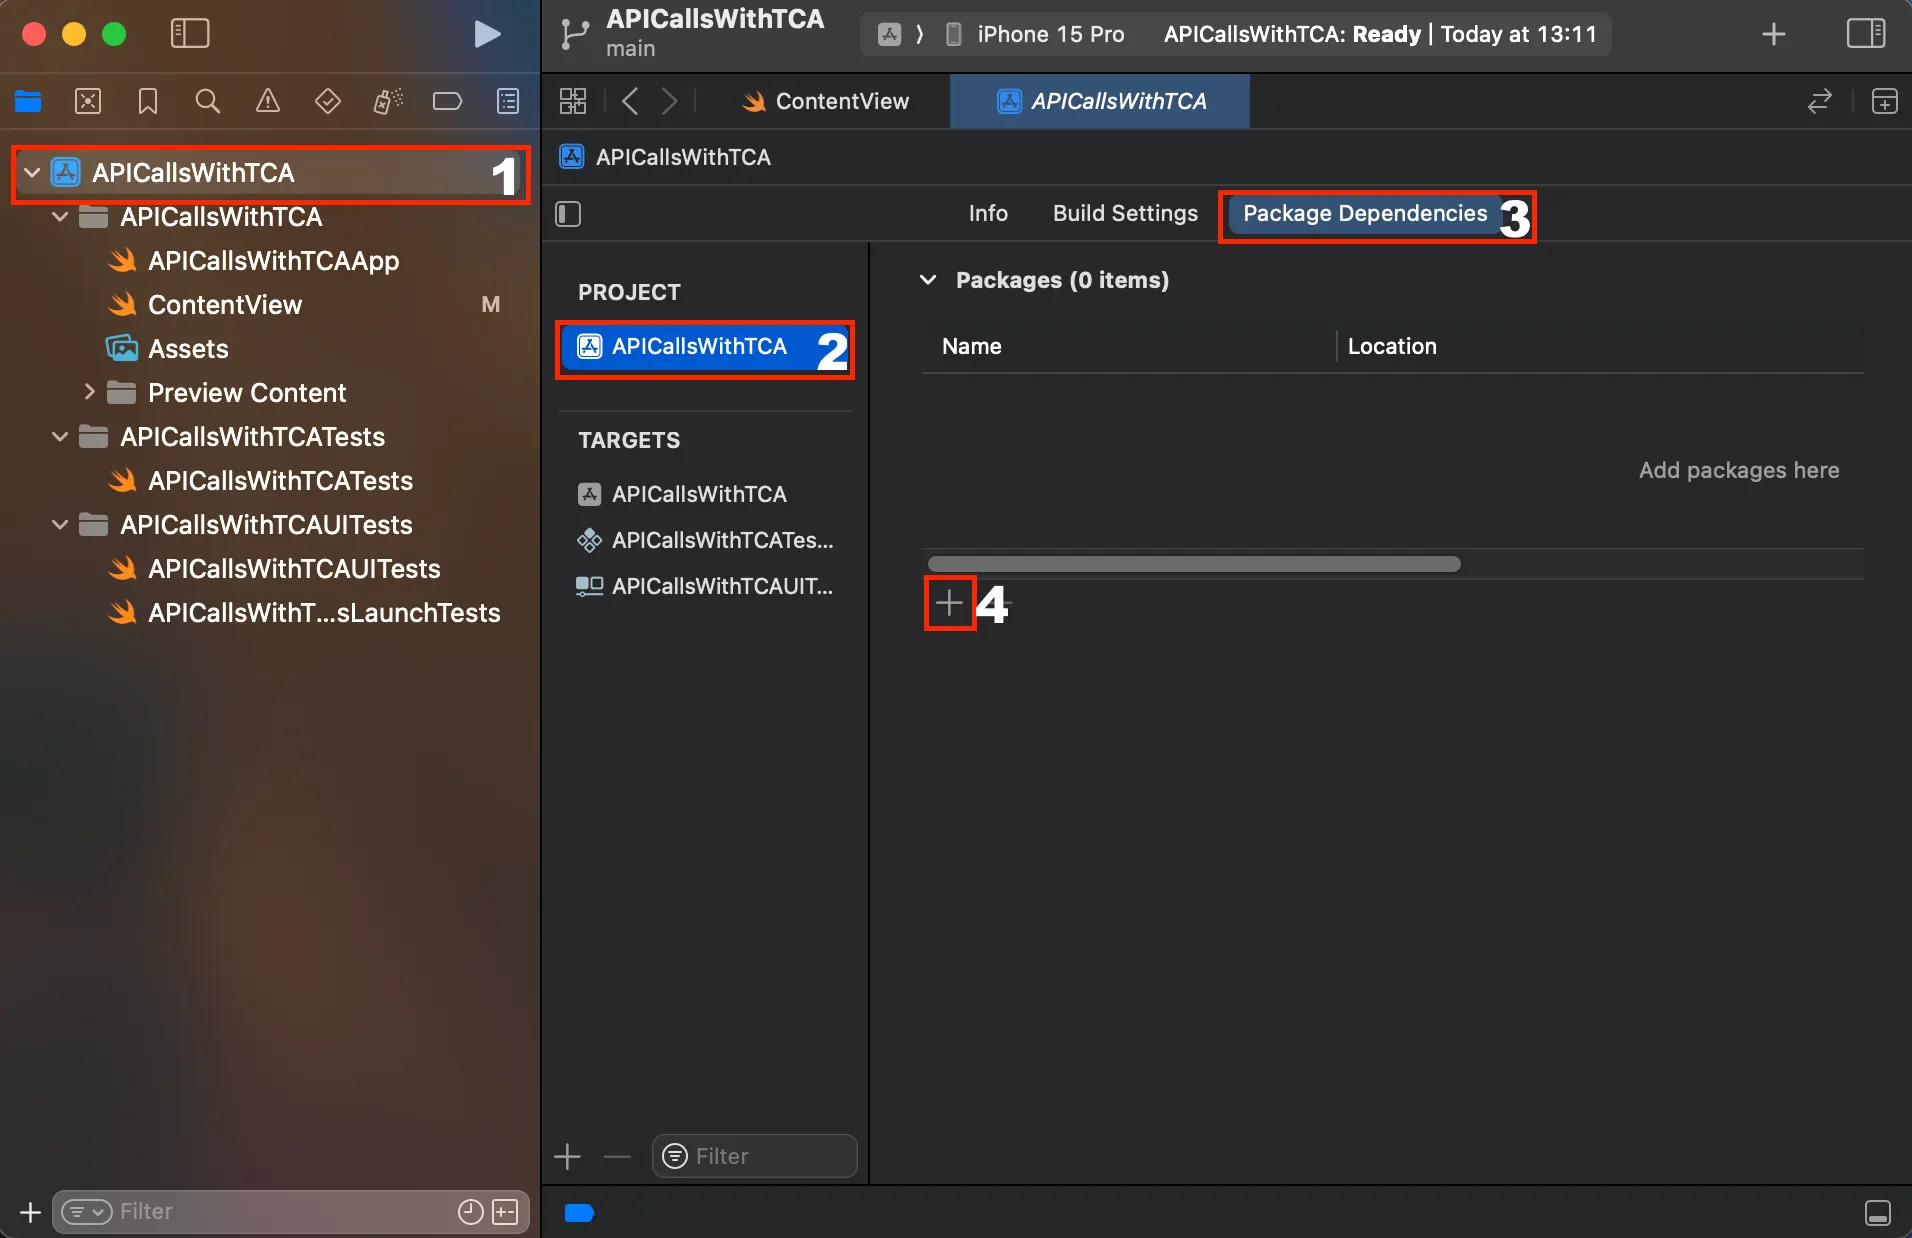
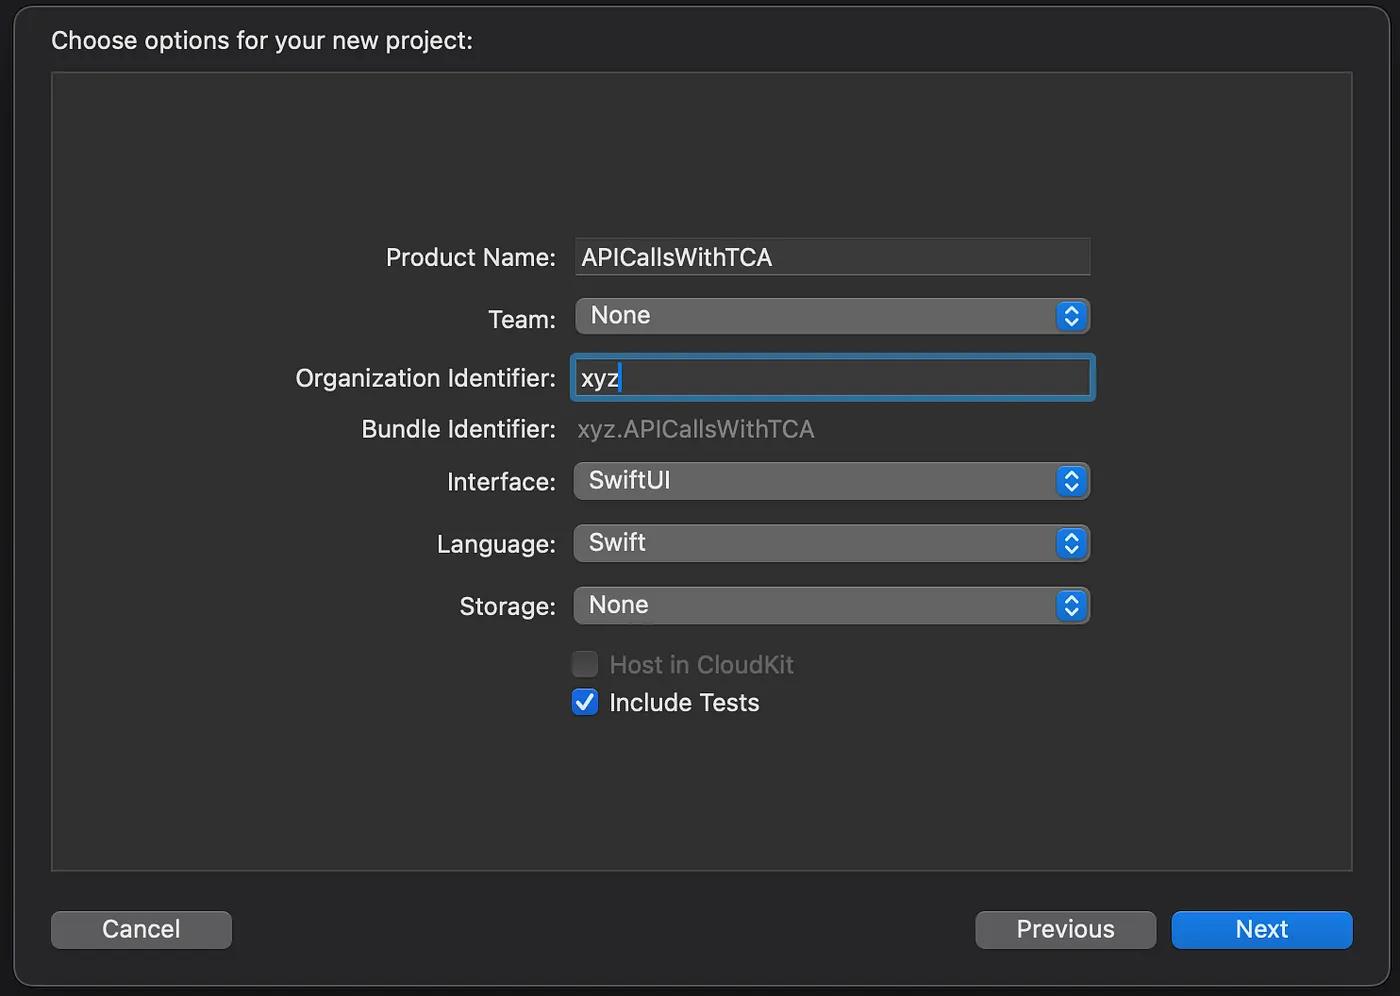 Click “Next” and select a location to save your project. Xcode will open it automatically. In the left sidebar, choose your app to access project settings. Navigate to the “Package Dependencies” tab and click the plus icon to add the TCA dependency.
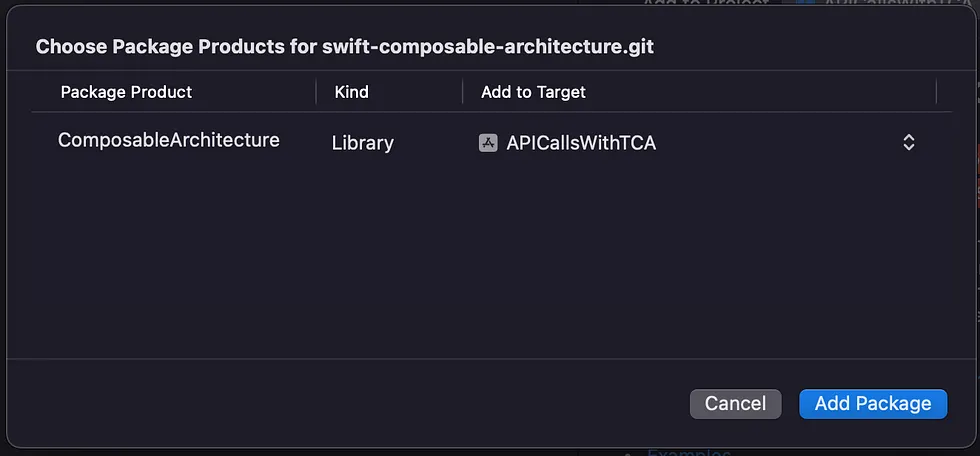
A window will open to add a package dependency. To add TCA, search for the package using Point-Free’s official Git repository link (https://github.com/pointfreeco/swift-composable-architecture.git) in the search bar. Select a package version between 0.59.0 and 2.0.0, then add the package to your project.
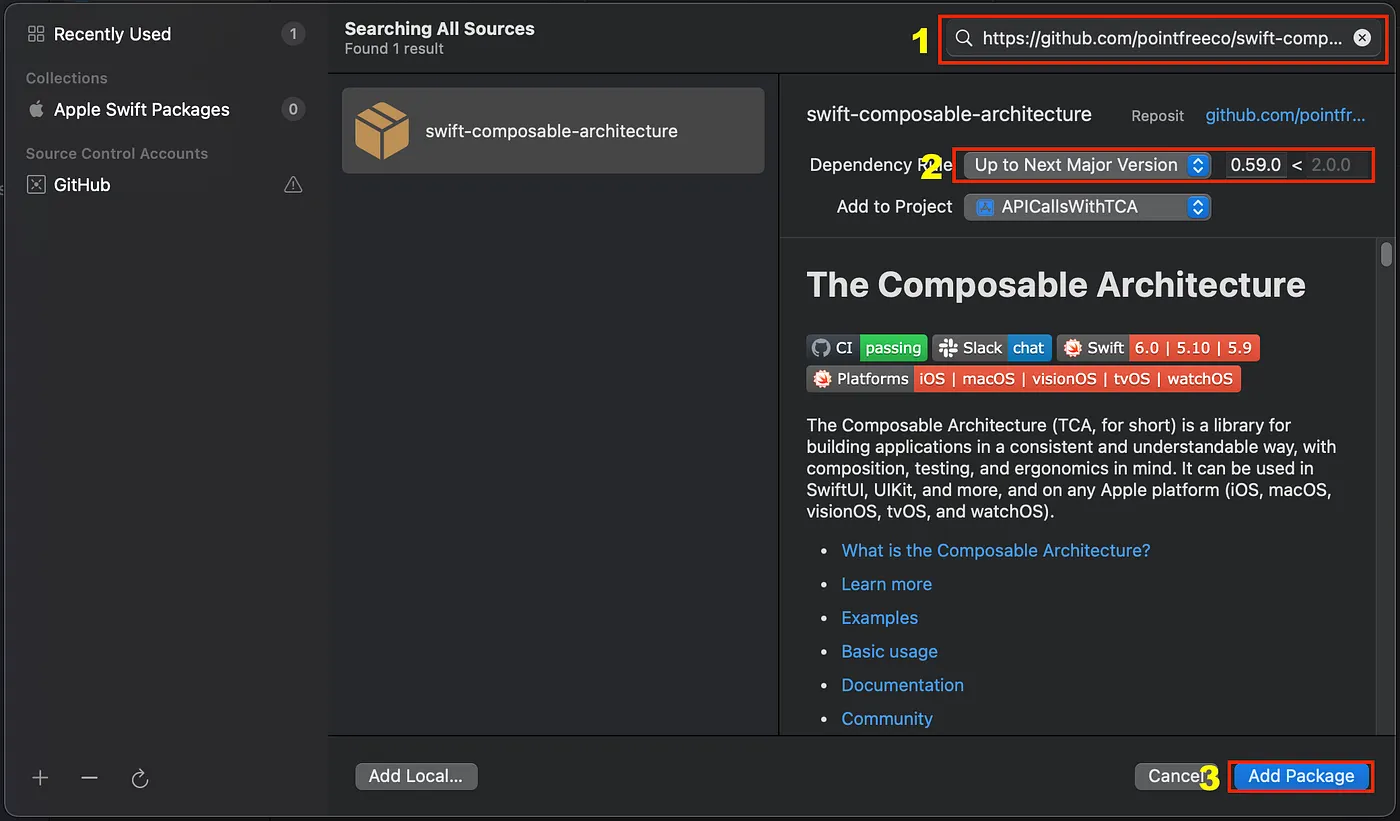
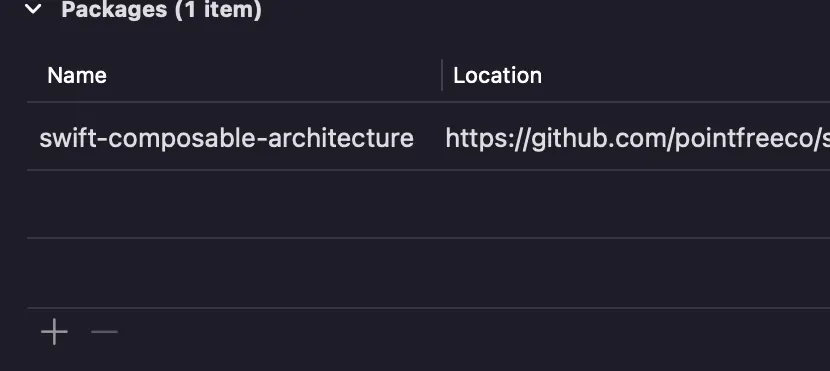
It takes a few seconds to verify the package. You’ll then be prompted to add it to the selected target. Once successfully added, you’ll see swift-composable-architecture listed under packages with your specified version.
Folder Structure
Point-Free recommends two standard approaches for organizing basic TCA views:
- Keep the reducer and view in a single Swift file.
- Separate them into two files within a SampleView folder:
- SampleFeature.swift for the reducer,
- SampleView.swift for the view
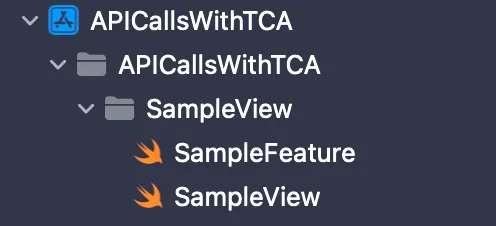
In this demonstration, we’ll keep the reducer and view in the same file. Point-Free recommends a code snippet for basic TCA views. You can add this snippet to Xcode and reuse it for other views. (Learn how to add code snippets to Xcode). Here’s the boilerplate for a TCA Basic View.
import ComposableArchitecture struct <#App#>Feature: Reducer { struct State: Equatable { init(){} } enum Action: Equatable { } var body: some ReducerOf { Reduce { state, action in switch action { } } } } struct <#App#>View: View { let store: StoreOf<<#App#>Feature> var body: some View { WithViewStore(self.store, observe: {$0}) { viewStore in <#code#> } } } #Preview { <#App#>View(store: Store(initialState: .init(), reducer: { <#App#>Feature() })) }
Set up UI and API models
Create a new Swift file named ProfileView.swift in your APICallsWithTCA project folder. This file will house the UI for displaying user information fetched from an API. We’ll use Reqres, a sample API that provides user data, including profile images. Add the TCA basic view snippet to this file, replacing App placeholders with Profile and the code placeholder with a simple “Hello World” text. Remember to include the SwiftUI import statement. Your file should now look like this:
import SwiftUI import ComposableArchitecture struct ProfileFeature: Reducer { struct State: Equatable { init(){} } enum Action: Equatable { } var body: some ReducerOf { Reduce { state, action in switch action { } } } } struct ProfileView: View { let store: StoreOf var body: some View { WithViewStore(self.store, observe: {$0}) { viewStore in Text("Hello World") } } } #Preview { ProfileView(store: Store(initialState: .init(), reducer: { ProfileFeature() })) }Next, we’ll create the API models to store the data for our UI. In the project folder, create a new Swift file called APIModels.swift and add these models:
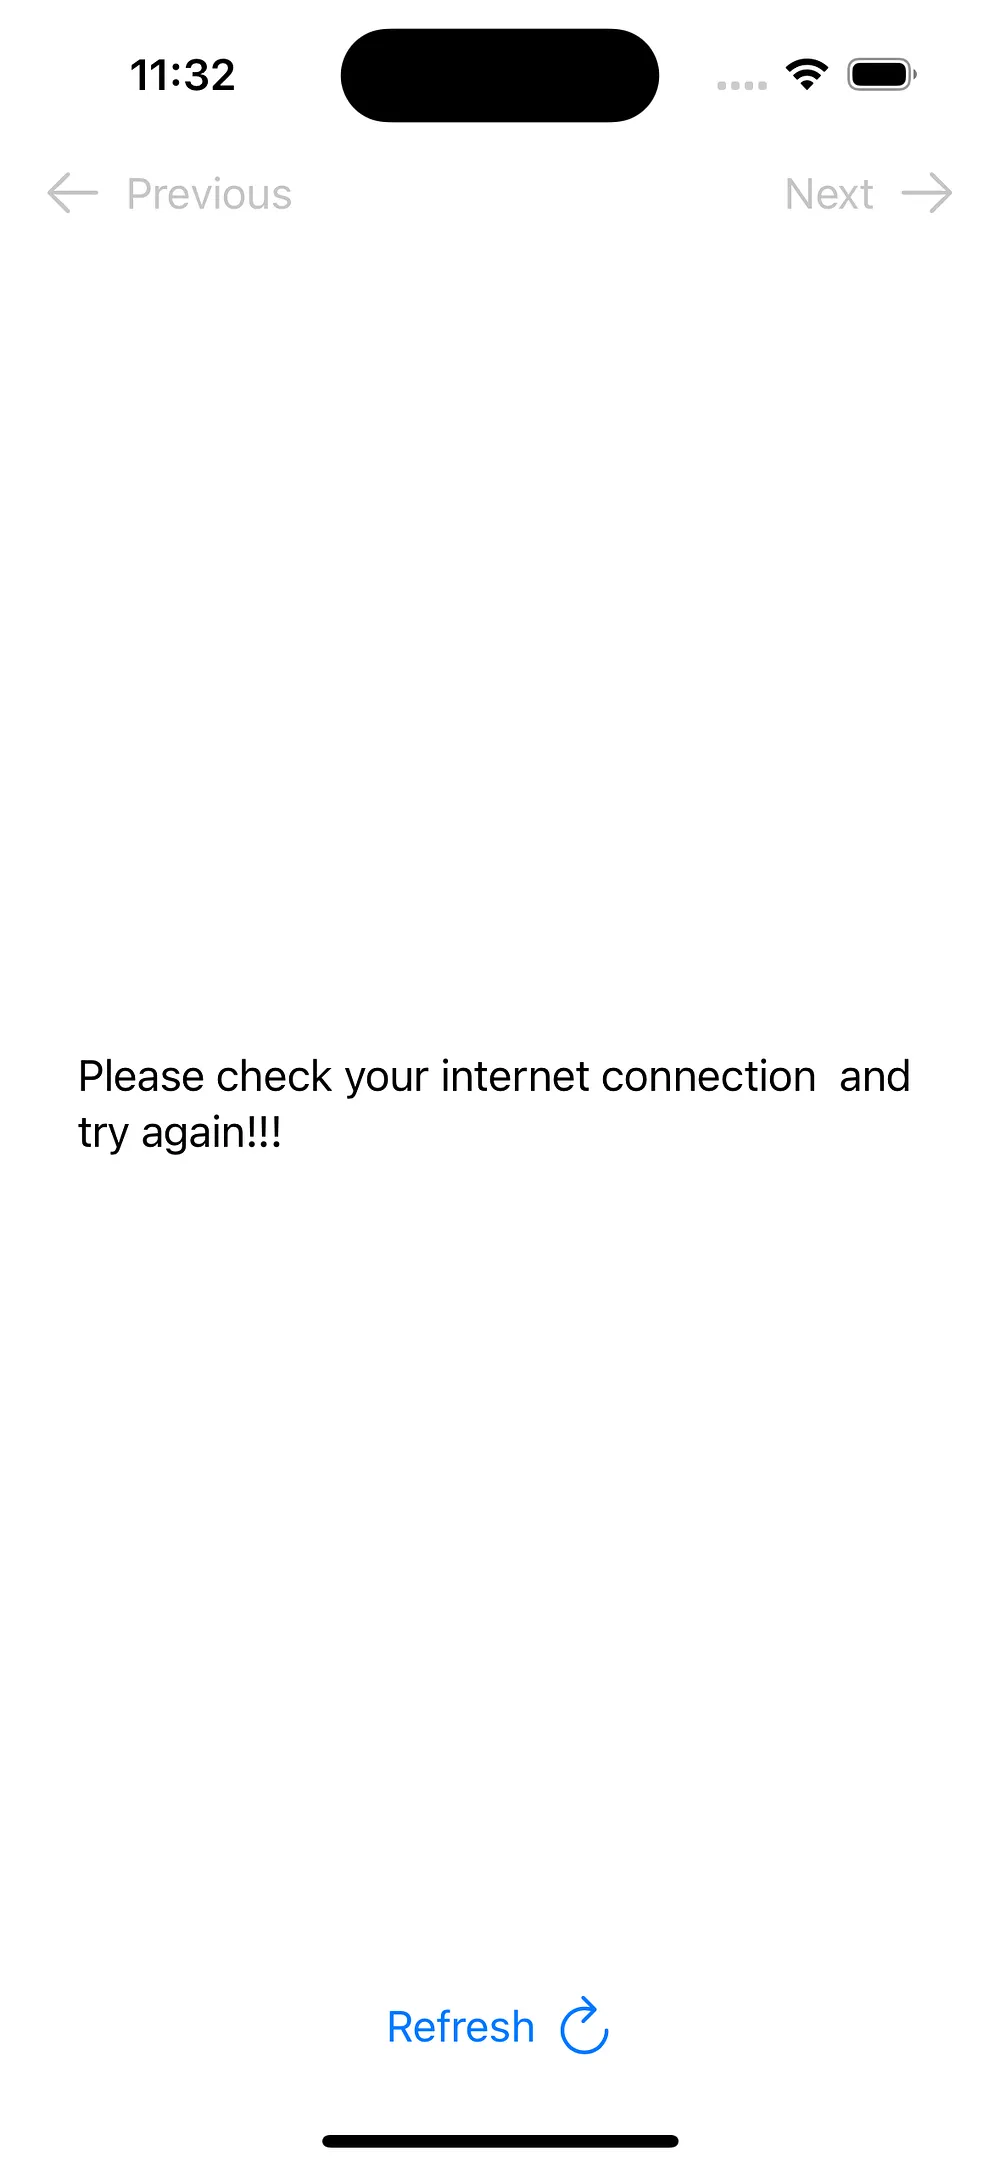
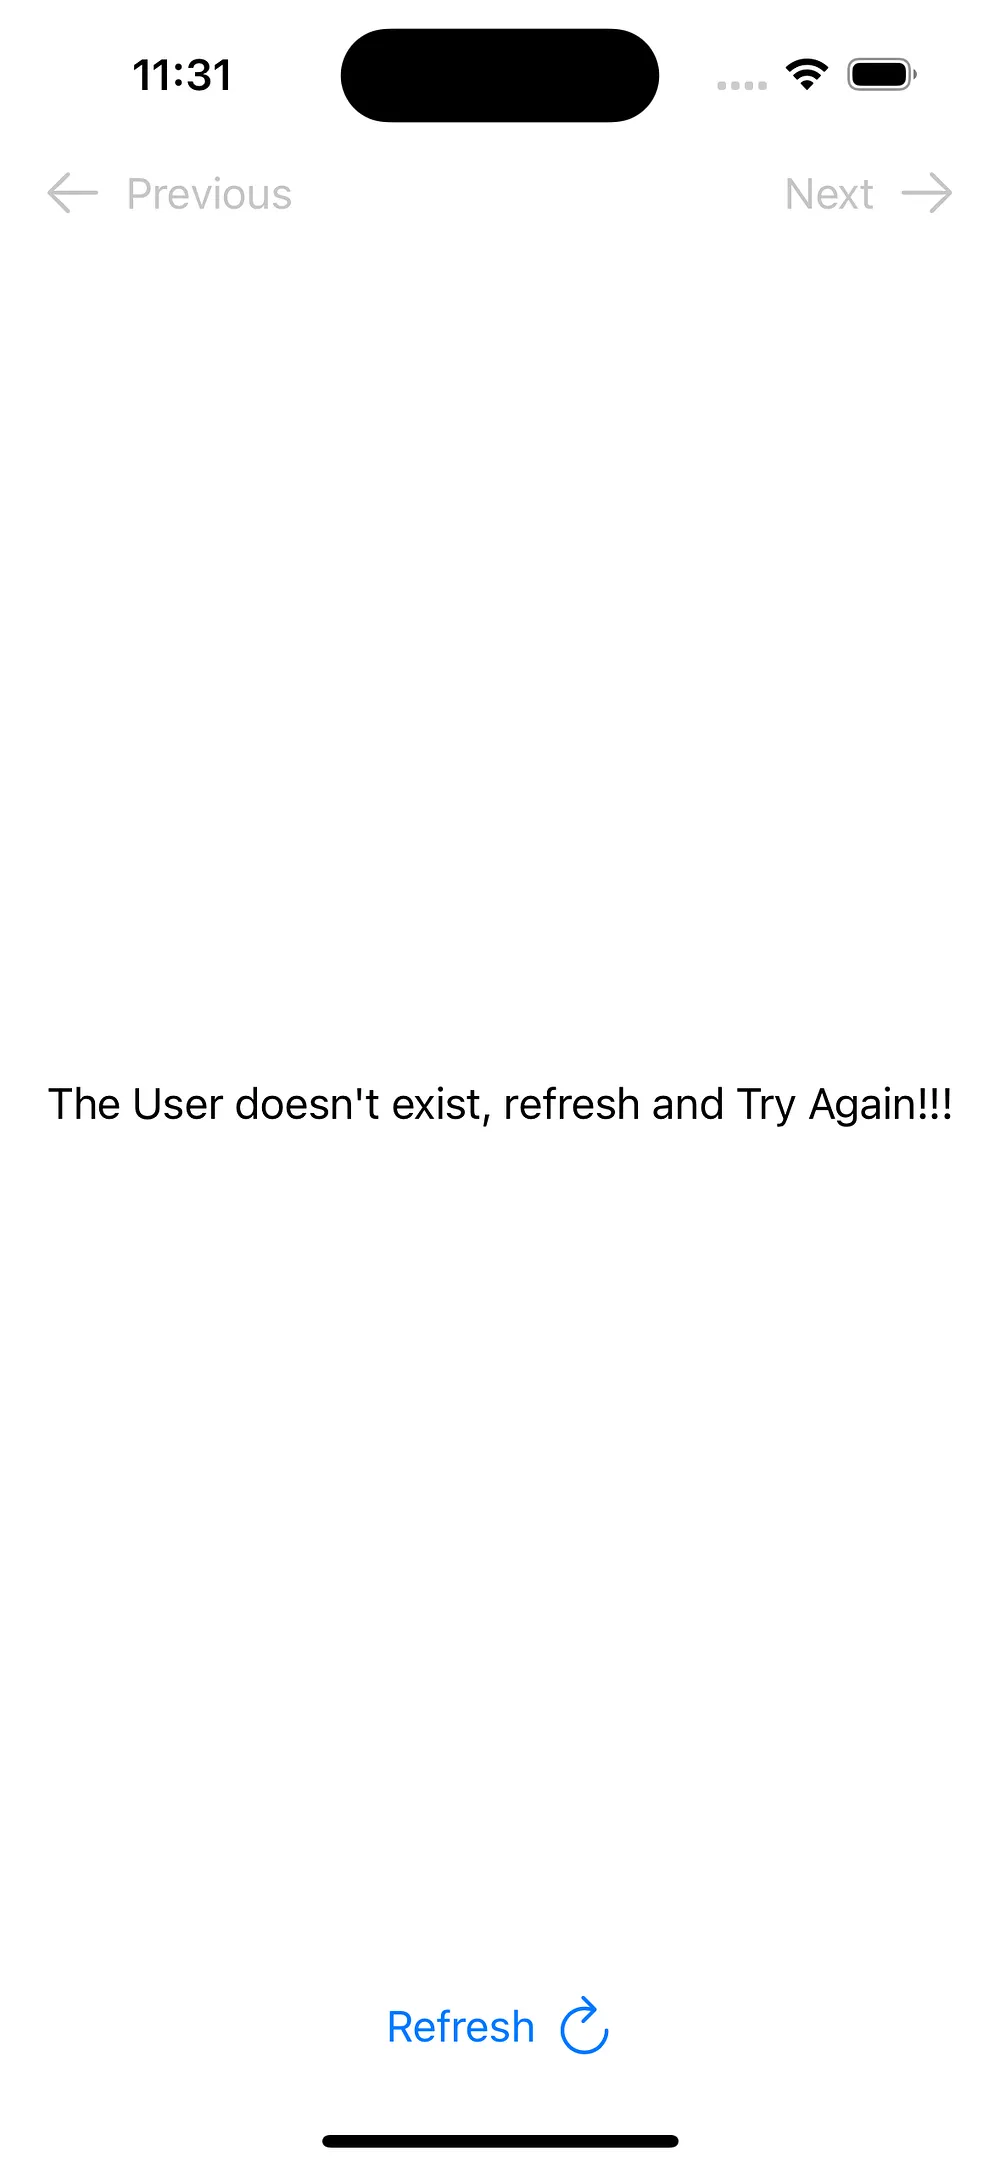
import Foundation struct SingleUser: Decodable { var data: UserData } struct UserData: Decodable, Equatable { var id: Int var email: String var firstName: String var lastName: String var avatar: String var fullName: String { "\(firstName) \(lastName)" } var avatarURL: URL { URL(string: avatar)! } enum CodingKeys: String, CodingKey { case id case email case avatar case firstName = "first_name" case lastName = "last_name" } } enum UserError: String, Equatable, Error { case serverError = "Please check your internet connection and try again!!!" case invalidUser = "The User doesn't exist, refresh and Try Again!!!" case invalidUrl = "Internal Errror refresh and Try Again!!!" case internalError = "Something went wrong refresh and Try Again!!!" }In the API models, UserData and UserError must conform to Equatable. This allows us to use them in the state as Result<UserData, UserError>, representing the API call’s outcome in the reduce function. Next, we’ll create UI components to display user data from Reqres. We’ll also add navigation buttons to the profile view, enabling users to switch between previous and next users.
struct ProfileView: View { let store: StoreOf var body: some View { WithViewStore(self.store, observe: {$0}) { viewStore in Text("Hello World") } } func profileComponent(_ user: UserData) -> some View { VStack { Spacer() Text("Profile") .font(.title) .bold() AsyncImage(url: user.avatarURL,scale: 0.5){image in image.scaledToFit().clipShape(Circle()) } placeholder: { ProgressView().frame(width:250,height: 250) } Text("User Id: \(user.id)") .foregroundColor(.gray) Text(user.fullName) .font(.title2) .bold() Link(user.email, destination: URL(string: "mailto://\(user.email)")!) Spacer() } } @ToolbarContentBuilder func profileControls( _ viewStore: ViewStoreOf ) -> some ToolbarContent { ToolbarItem(placement: .navigationBarLeading) { Button { viewStore.send(.previousUserButtonTapped) } label: { Image(systemName: "arrow.left") Text("Previous") } .disabled(viewStore.errorMessage != nil) } ToolbarItem(placement: .status) { Button { viewStore.send(.refreshButtonTapped) } label: { Text("Refresh") Image(systemName: "arrow.clockwise") } } ToolbarItem(placement: .navigationBarTrailing) { Button { viewStore.send(.nextUserButtonTapped) } label: { Text("Next") Image(systemName: "arrow.right") } .disabled(viewStore.errorMessage != nil) } } }In the profileControls, we’re sending actions defined in the Action enum and accessing the errorMessage from the State struct. To resolve the current errors in the editor, let’s add the necessary state variables and actions to control the UI.
struct State: Equatable { var id: Int = 1 var errorMessage: String? var response: Result<UserData, ApiError>? }In the State model, we use these variables:
- id: Fetches a specific user and is passed in the API query.
- errorMessage: Shows API errors in the UI.
- response: Stores the API call’s success or failure result.
enum Action: Equatable { case nextUserButtonTapped case previousUserButtonTapped case refreshButtonTapped case fetchData case fetchResponse(Result<UserData, ApiError>) }In the Action enum, we define the following actions:
- nextUserButtonTapped: Fetches and displays the next user in the list.
- previousUserButtonTapped: Fetches and displays the previous user in the list.
- refreshButtonTapped: Resets the user ID and fetches data again, useful in case of network failures.
- fetchData: Initiates an API call to retrieve the UserData.
- fetchResponse: Handles the API response from the fetchData action.
Next, we’ll implement the reduce function to manipulate state variables based on the profile control actions. Since Action is an enum, we’ll use a switch statement to handle each action. For all button controls, we need to fetch API data after state variable changes. To achieve this, we’ll send the fetchData action in the effect of each action. To prevent API calls when an error occurs, we’ll guard the fetchData action in the next and previous button cases.
Reduce { state, action in switch action { case .nextUserButtonTapped: guard state.errorMessage == nil else { // Guarding the fetching of data when error exist return .none } state.id += 1 return .send(.fetchData) case .previousUserButtonTapped: guard state.errorMessage == nil else { // Guarding the fetching of data when error exist return .none } state.id -= 1 return .send(.fetchData) case .refreshButtonTapped: state.id = 1 return .send(.fetchData) case .fetchData: return .none case .fetchResponse: return .none } }With all these changes in place, the reducer now looks like this:
struct ProfileFeature: Reducer { struct State: Equatable { var id: Int = 1 var errorMessage: String? var response: Result<UserData, UserError>? } enum Action: Equatable { case nextUserButtonTapped case previousUserButtonTapped case refreshButtonTapped case fetchData case fetchResponse(Result<UserData, UserError>) } var body: some ReducerOf { Reduce { state, action in switch action { case .nextUserButtonTapped: guard state.errorMessage == nil else { return .none } state.id += 1 return .send(.fetchData) case .previousUserButtonTapped: guard state.errorMessage == nil else { return .none } state.id -= 1 return .send(.fetchData) case .refreshButtonTapped: state.id = 1 return .send(.fetchData) case .fetchData: return .none case .fetchResponse: return .none } } } }Make the Network Call and API Config
With the profile view component and controls in place, let’s create the API call function. We’ll utilize this function in the fetchData effect to make network requests and handle the response in the fetchResponse action. To begin, we’ll set up an API configuration file that accepts a user id and returns UserData. Create a new Swift file called APIConfig.swift and implement the API call functionality.
import Foundation enum APIConfig { static func getUser(id: Int) async throws -> Result<UserData, UserError> { let baseUrl = "https://reqres.in/api/" let users = "users/" // Building the api url guard let userUrl = URL(string:"\(baseUrl)\(users)\(id)") else { return .failure(.invalidUrl) } do { let userRequest = URLRequest(url: userUrl) let (data, response) = try await URLSession.shared.data(for: userRequest) // Handling Error response with HTTP status code if let httpResponse = response as? HTTPURLResponse { switch httpResponse.statusCode { case 200: break case 404: return .failure(.invalidUser) case 500..<599: return .failure(.serverError) default: return .failure(.internalError) } } // Data decoding from json into object guard let usersData = try? JSONDecoder().decode(SingleUser.self, from: data) else { return .failure(.internalError) } // (Optional) Clearing cache and cookies from previous URLSession await URLSession.shared.reset() return .success(usersData.data) } catch { return .failure(.serverError) } } }Using this API configuration, we can make an API call in the fetchData action by passing the id to the getUser function. We then handle the API response using another action, sending fetchResponse via the send parameter provided by the .run effect. Note: The state is restricted in effect because it’s not allowed as a mutable inout parameter in concurrently executing code. This will throw an error like:
Mutable capture of the ‘inout’ parameter ‘state’ is not allowed in concurrently executing code.
To access state as a normal variable, we capture it as [state = state] in the run effect and pass the id to the API function. Before making the API call, we need to clear the previous error message and response. With these changes, fetchData looks like this:
case .fetchData: state.errorMessage = nil state.response = nil return .run { [state = state] send in let response = try await APIConfig.getUser(id: state.id) await send(.fetchResponse(response)) }Now we need to handle the success and failure responses of the API call in the fetchResponse action. On success, we’ll assign the user data to the response, which will be used to display the profile view. On failure, we’ll assign the error to response and set the error message in errorMessage state variable. Here’s how the fetchResponse action looks after these changes:
case .fetchResponse(.success(let userData)): state.response = .success(userData) return .none case .fetchResponse(.failure(let error)): state.response = .failure(error) state.errorMessage = error.rawValue return .noneWith all the changes, Reduce function looks like this:
Reduce { state, action in switch action { case .nextUserButtonTapped: guard state.errorMessage == nil else { return .none } state.id += 1 return .send(.fetchData) case .previousUserButtonTapped: guard state.errorMessage == nil else { return .none } state.id -= 1 return .send(.fetchData) case .refreshButtonTapped: state.id = 1 return .send(.fetchData) case .fetchData: state.errorMessage = nil state.response = nil return .run { [state = state] send in let response = try await APIConfig.getUser(id: state.id) await send(.fetchResponse(response)) } case .fetchResponse(.success(let userData)): state.response = .success(userData) return .none case .fetchResponse(.failure(let error)): state.response = .failure(error) state.errorMessage = error.rawValue return .none } }Handling the API Response in UI
API calls often take time to fetch data, depending on network conditions. To keep users informed, we can display a loading view as a placeholder. Once the API call retrieves the data, it’s assigned to the result and displayed in the profile component. We use UserData for the success state and show an error message for failure. While the response is nil, we display a loading view. By switching on the result, we efficiently manage the loading, failure, and success states of the API call. To kick off the initial API call, we leverage the .task modifier in the parent stack. This nifty modifier runs asynchronous code, enabling us to fire off the fetchData action.
VStack { switch viewStore.response { case .success(let user): self.profileComponent(user) case .failure: Text(viewStore.errorMessage ?? "") case nil: ProgressView("Loading") .progressViewStyle(.circular) .tint(.accentColor) .scaleEffect(1.3) } } .padding(.all) .task { viewStore.send(.fetchData) }By adding the profileControls to the toolbar of the parent stack, we can see the finalized version of the profile view UI. Replace the body in the view with the code snippet below:
var body: some View { WithViewStore(self.store, observe: {$0}) { viewStore in VStack { switch viewStore.response { case .success(let user): self.profileComponent(user) case .failure: Text(viewStore.errorMessage ?? "") case nil: ProgressView("Loading") .progressViewStyle(.circular) .tint(.accentColor) .scaleEffect(1.3) } } .padding(.all) .task { viewStore.send(.fetchData) } .toolbar { self.profileControls(viewStore) } } }Replace the main app with a profile view and wrap it in NavigationView:
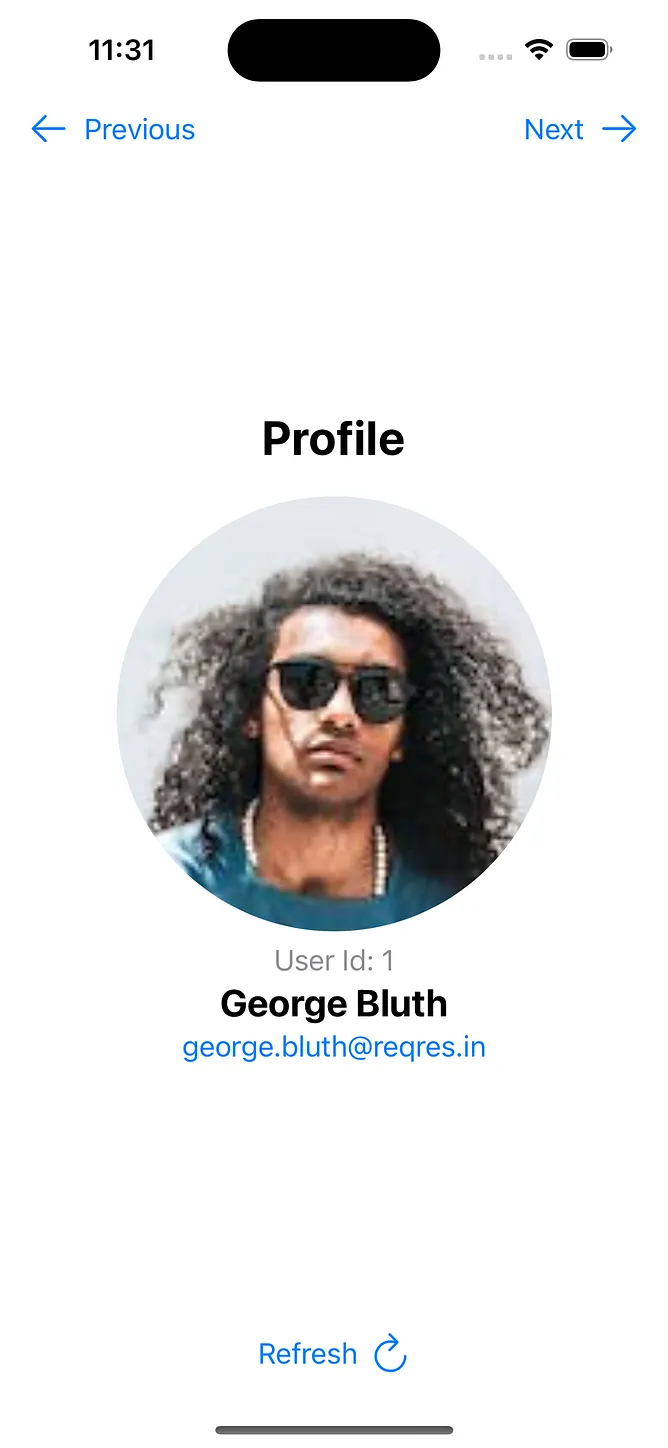
import SwiftUI @main struct APICallsWithTCAApp: App { var body: some Scene { WindowGroup { NavigationView { ProfileView(store: .init(initialState: .init(), reducer: { ProfileFeature() })) } } } }Run the app in the simulator and test it to ensure all UI screens function correctly.
The profile view screens will look like this:
Conclusion
Integrating API calls in SwiftUI using The Composable Architecture (TCA) brings clarity, testability, and scalability to your codebase. By separating state, actions, and side effects, TCA allows you to manage asynchronous logic in a clean and maintainable way. Whether you’re building a simple app or a complex feature set, TCA provides a consistent structure that supports long-term growth and robustness in your SwiftUI projects.
Check out the GitHub repository for further reference.