We usually use SSH to access the terminals on servers and containers. However, this often requires installing SSH servers within the containers and using additional tools like Putty to connect to the terminal via SSH.
But what if we could make things easier by bypassing the need for additional tools? And what if we could build a browser-based terminal that provides direct access to the container or server from a browser? With web terminals, you can access the server’s terminal via a browser without sharing any SSH keys, and only the login credentials for the web app that runs the terminal are required. Additionally, web terminals can be easily customized and configured for controlled access.
Visual Studio Code’s terminal is a good example of a web terminal. It is built on ElectronJS and features an integrated terminal with XtermJS, which allows users to access the terminal directly from within VS Code.
This article discusses the implementation of a frontend web terminal using XtermJS, which connects to a Docker instance via a WebSocket connection. This enables remote access to the Docker container’s terminal from a web browser. By using a web-based terminal, users can streamline the process of accessing the terminal of their servers and containers, making it more convenient and user-friendly.
Prerequisites
- A system running Docker.
- Socat– A command-line based utility that establishes two bidirectional byte streams and transfers data between them.
- xtermjs– A frontend library written in TypeScript that lets us build customizable, fully-featured terminals that work with web browsers.
- Xterm-addon-attach– An add-on for xterm.js which helps to attach it to a web socket. Works with xterm.js v4+.
- Access to a terminal window/command prompt.
- Web browser.
Setting Up the Web Terminal
We use the Docker attach API to establish a connection between the standard input, output, and error of the terminal and a running container, identified by its unique ID. This allows us to view ongoing output or interact with the container in a way that simulates the direct execution of commands within the terminal.
When a command is entered into the web terminal, it is transmitted to the container via the WebSocket connection, where it is executed within the terminal environment of the container. The resulting response is then sent back through the same WebSocket connection.
By using the attach add-on, we can connect the web terminal to a WebSocket stream that has been established through Docker’s WebSocket attach endpoint.
-
Start a sample docker container
To launch an alpine Linux container run:
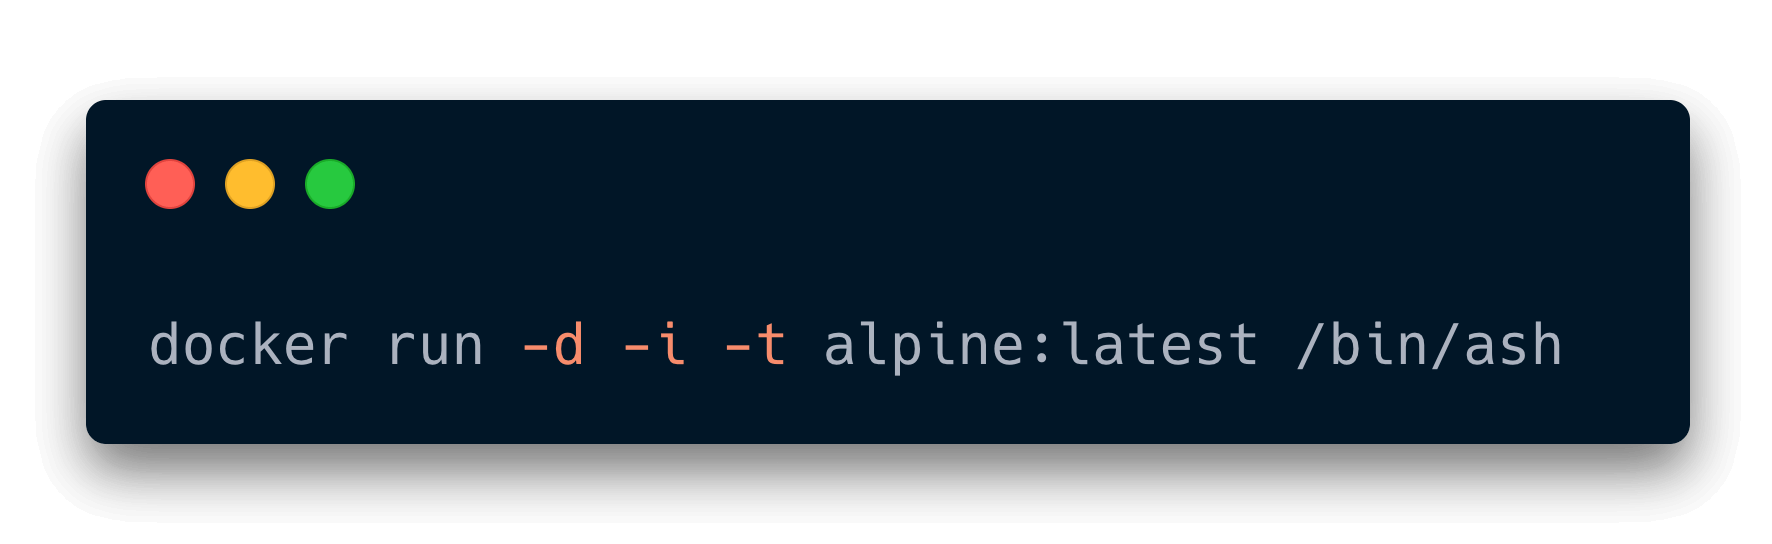
-d: To start a container in detached mode
-i: Keep STDIN open even if not attached
-t: Allocate a pseudo-tty
-
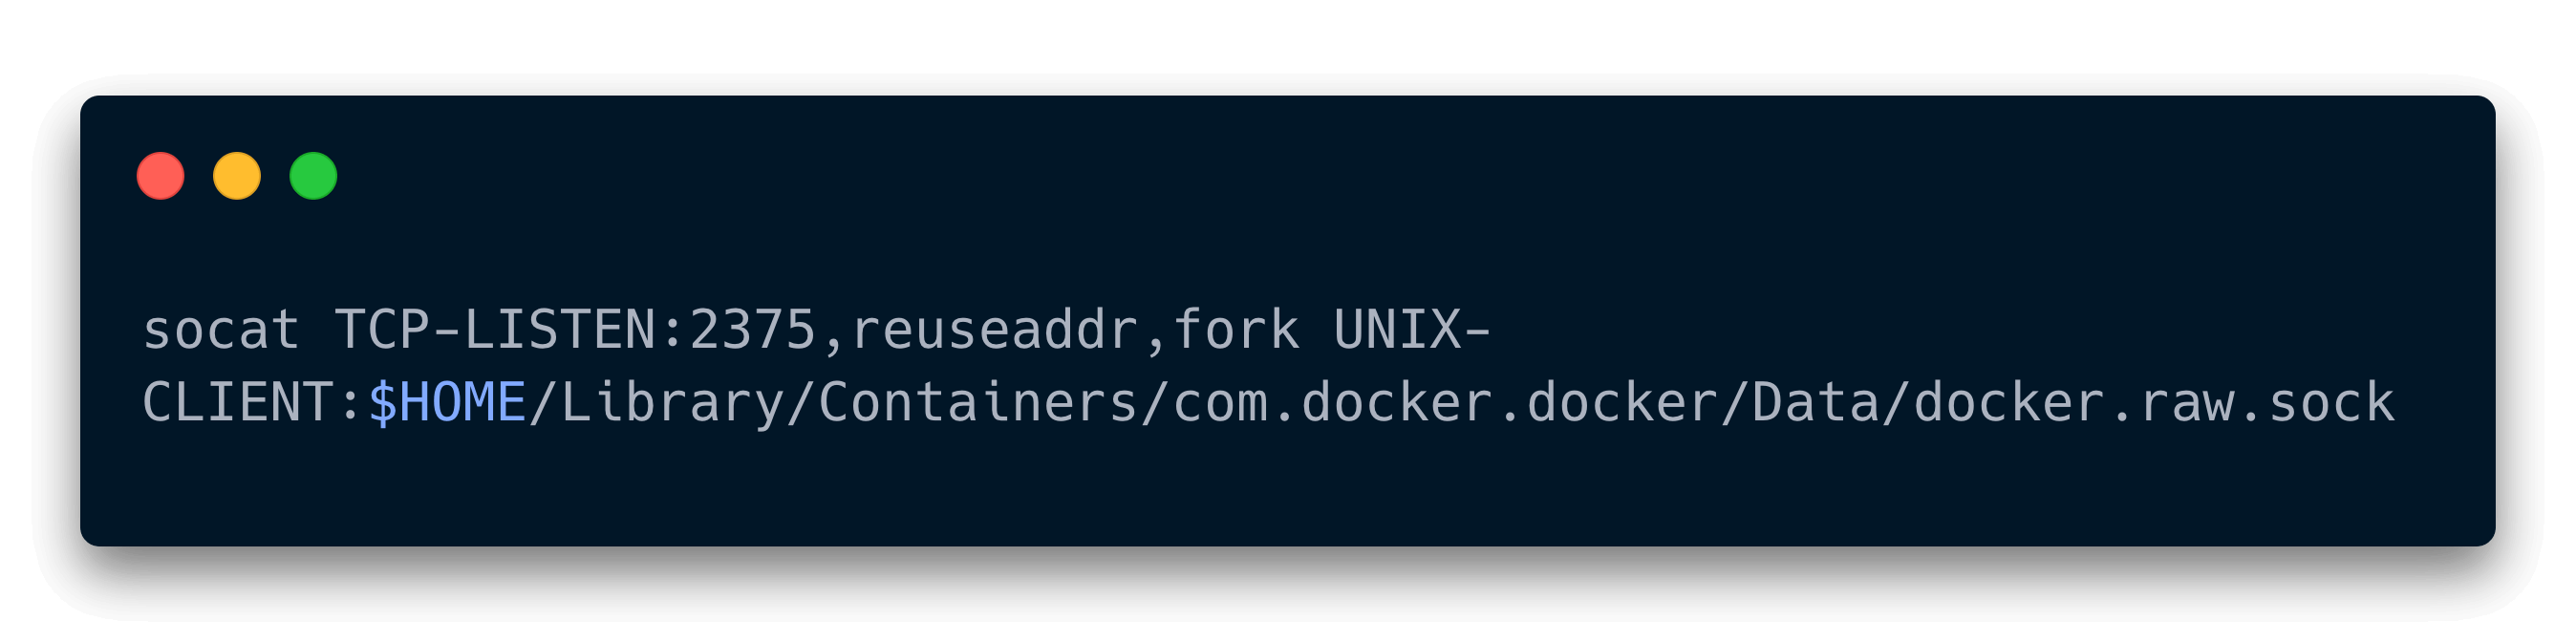
Redirect TCP traffic to Docker socket using socat:
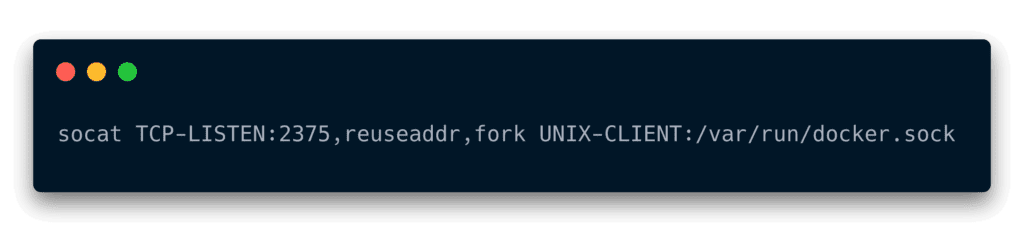
⚠️ Command for Mac OS:
-
Construct the WebSocket endpoint
Obtain the docker container id by running:
docker ps
This will generate the output as follows:

Copy the container id for the WebSocket endpoint.
The WebSocket URL format is:
ws://<host>:<port>/containers/<containerid>/attach/ws?stream=1&stdout=1&stdin=1&logs=1
- stream– 1/True/true or 0/False/false, return stream. Default false.
- stdin– 1/True/true or 0/False/false, if stream=true, attach to stdin. Default false.
- stdout– 1/True/true or 0/False/false, if logs=true, return stdout log, if stream=true, attach to stdout. Default false.
- stderr– 1/True/true or 0/False/false, if logs=true, return stderr log, if stream=true, attach to stderr. Default false.
- logs– 1/True/true or 0/False/false, return logs. Default false.
If docker container is running on local the URL will look like this:

-
Test the WebSocket URL
We can test the WebSocket using postman. Send a sample message in postman to the WebSocket URL; it should return a binary response.
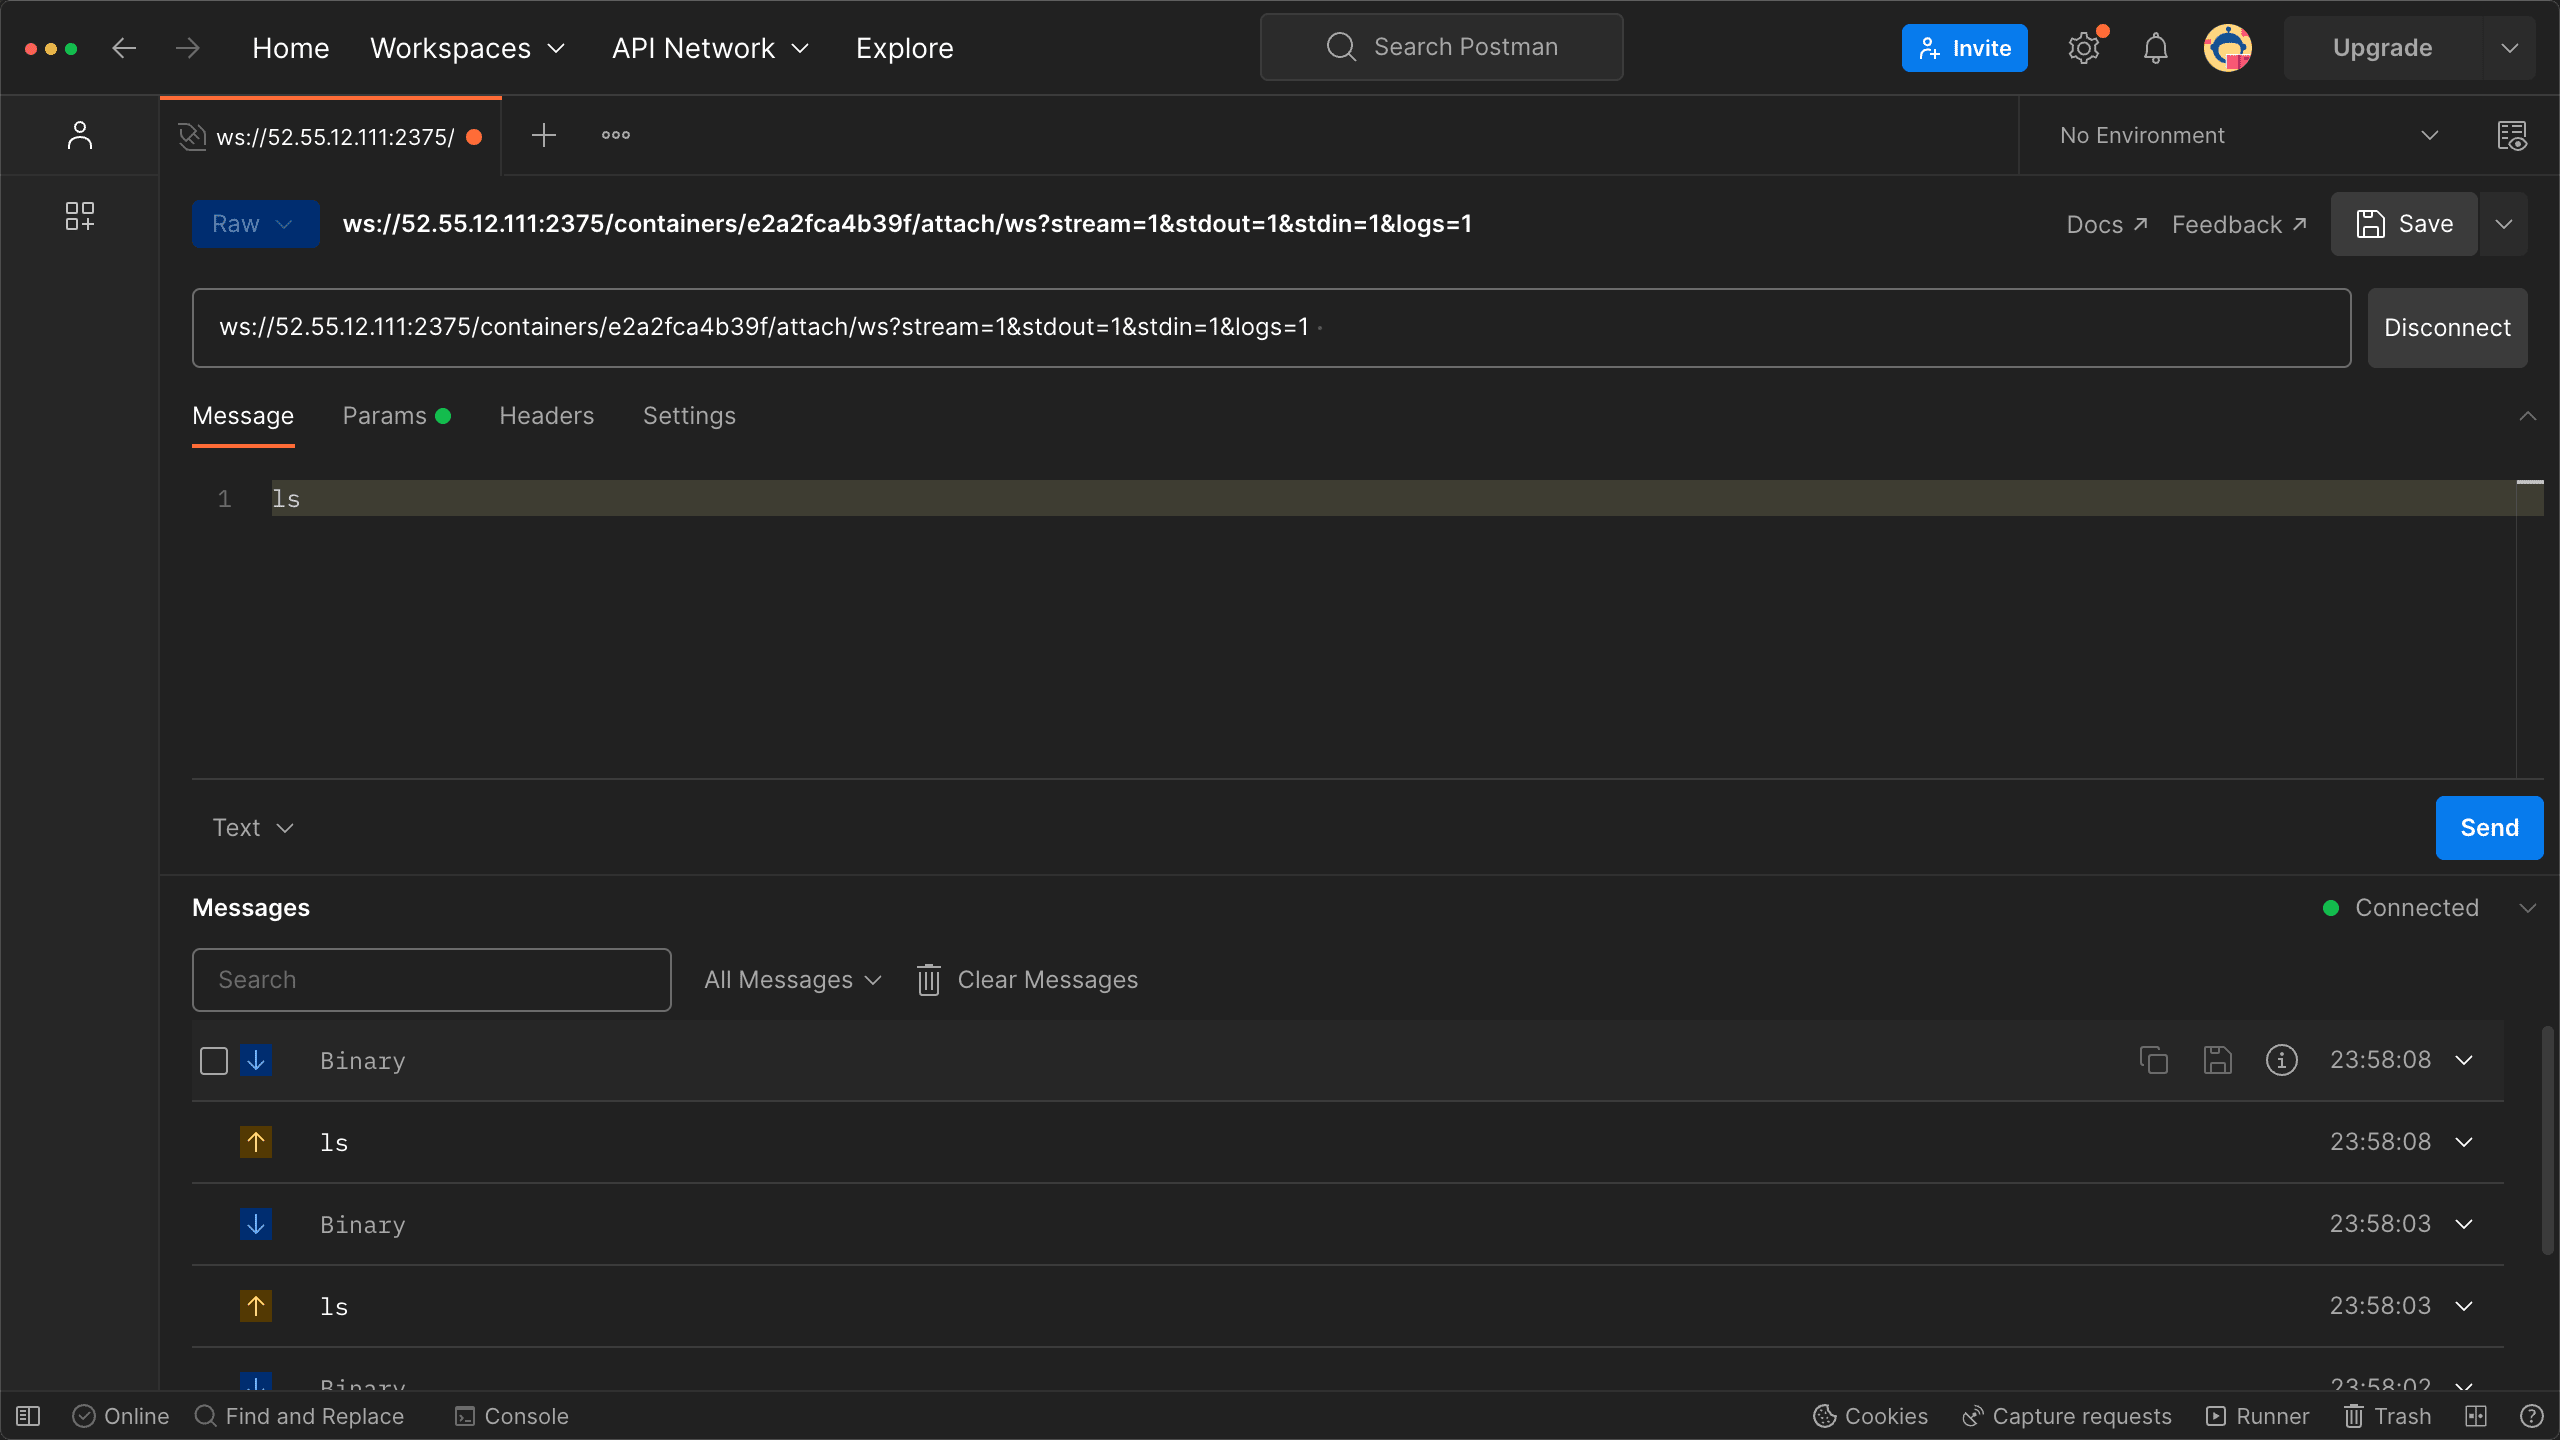
Testing the WebSocket endpoint in postman
-
If the URL works, attach it directly to the Xterm instance in the frontend
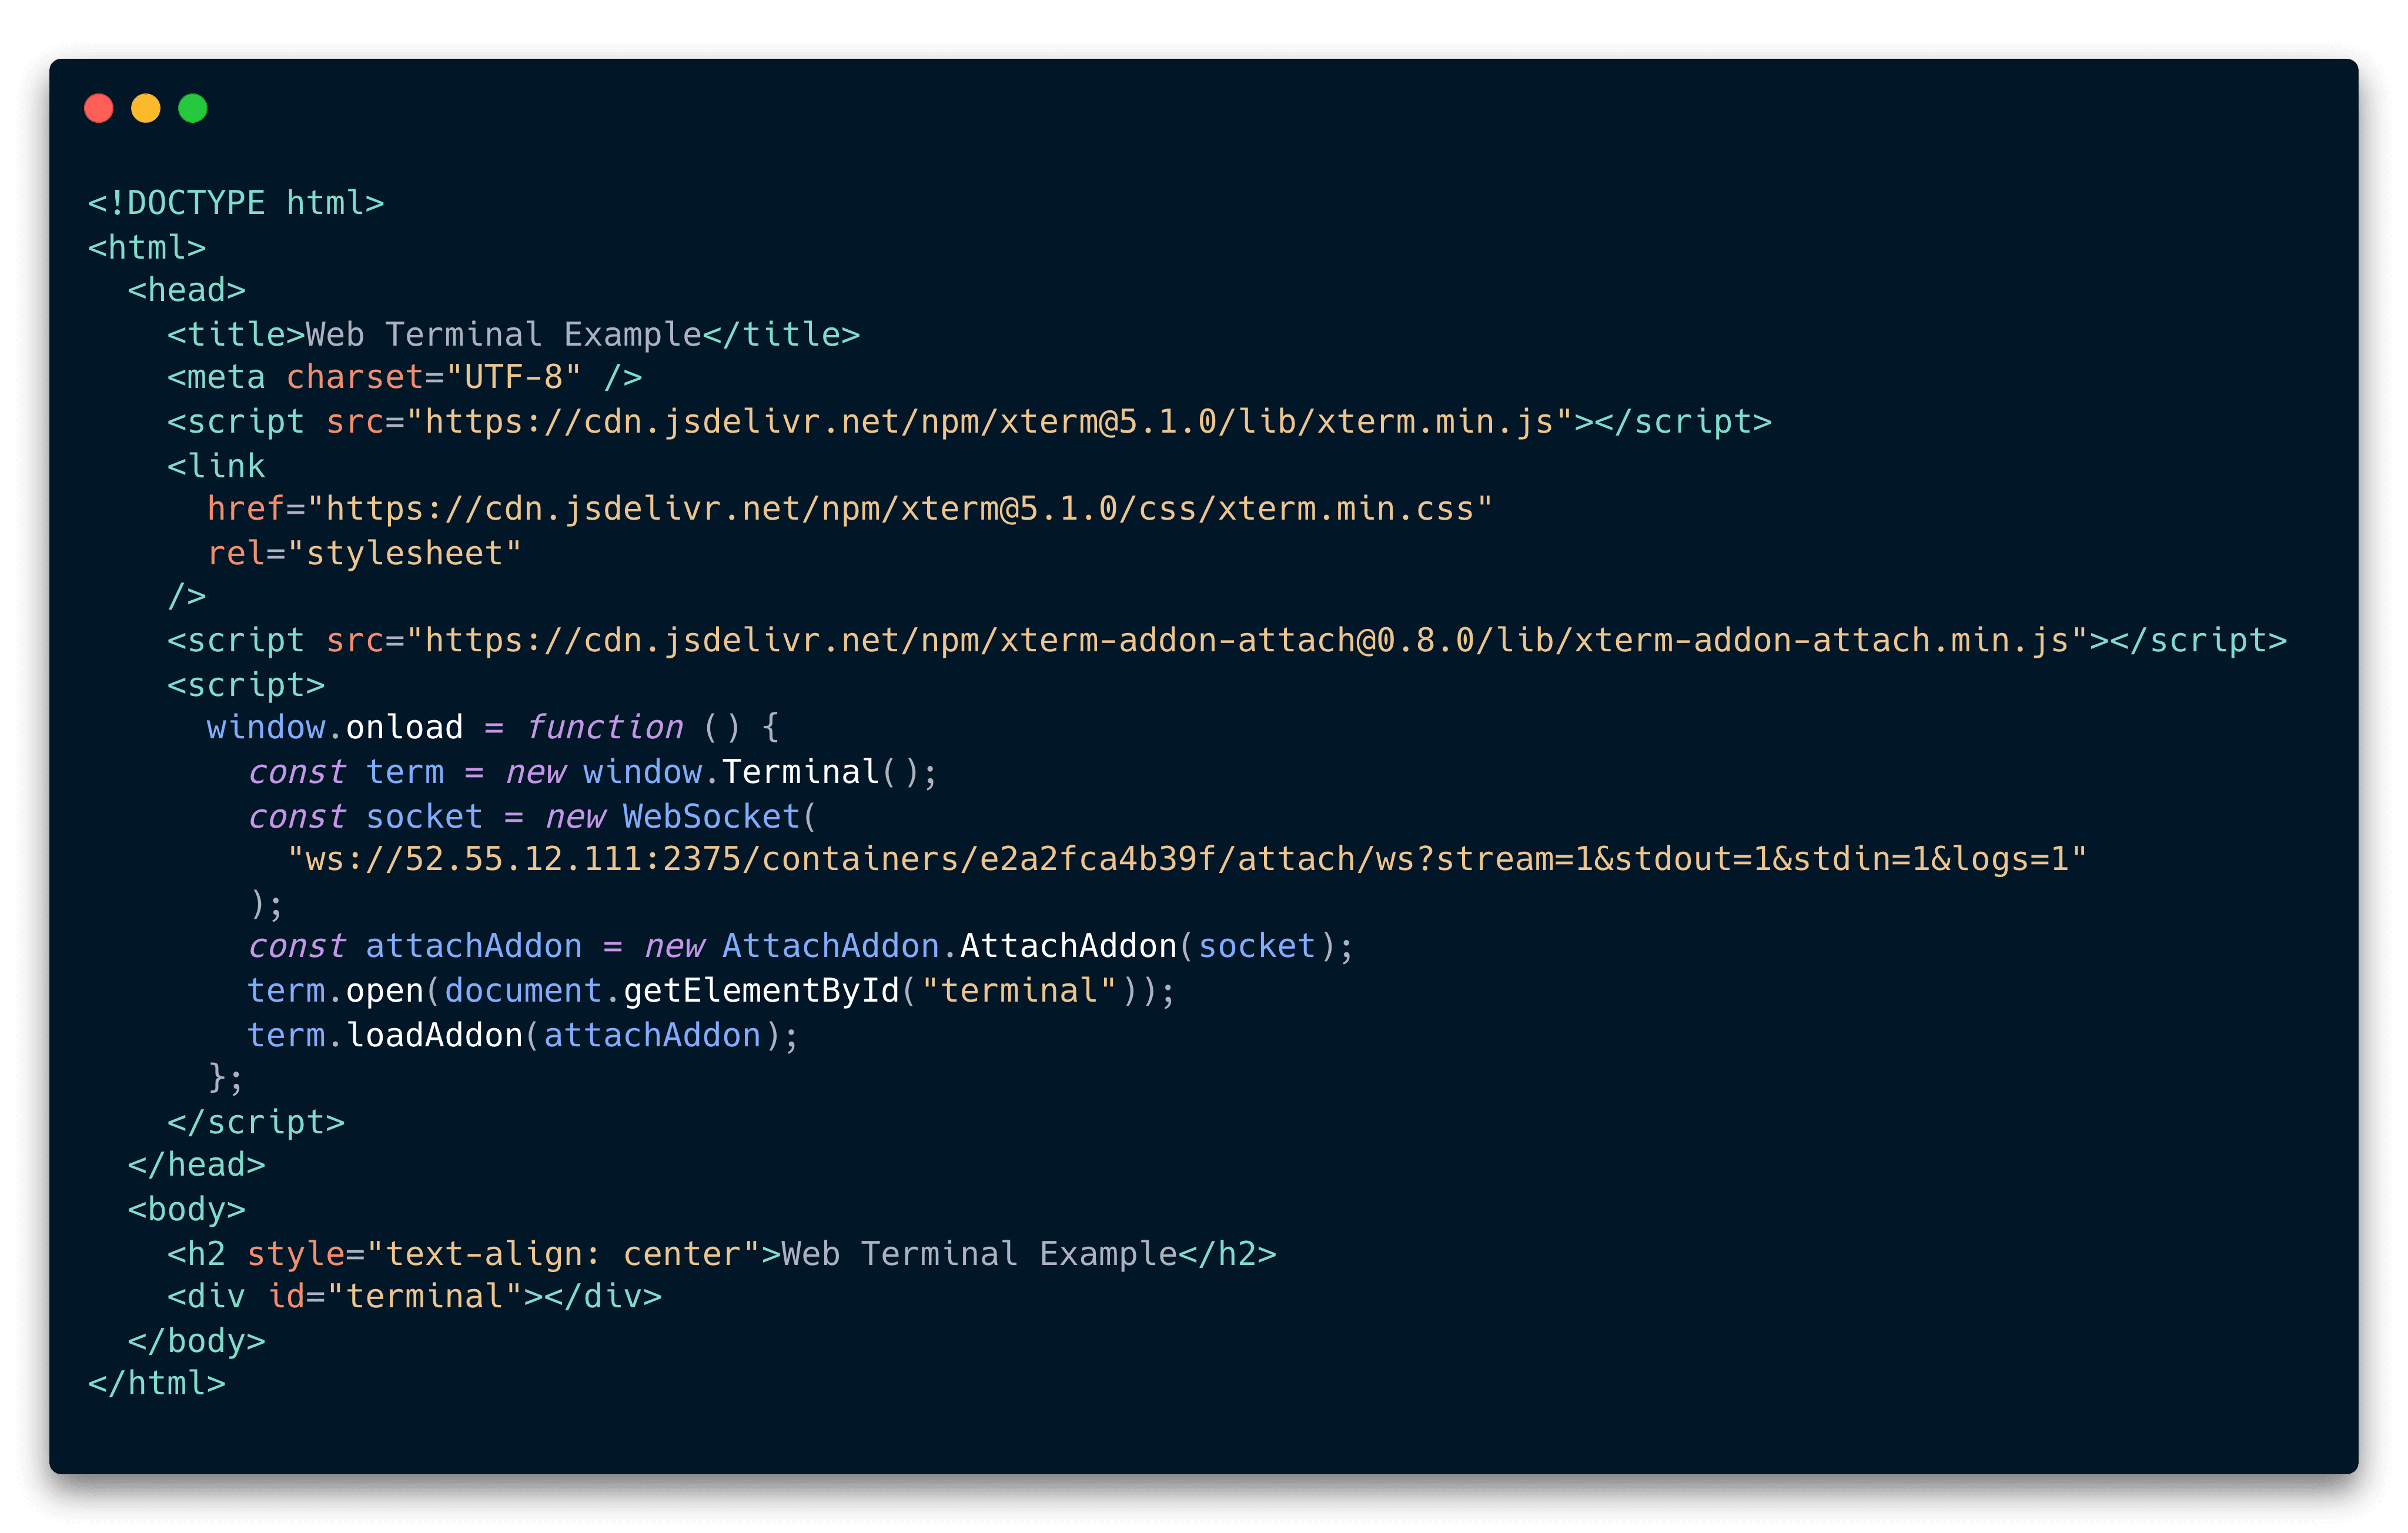
Frontend code for creating a web terminal using xterm.js.
There should be only one instance for Terminal, WebSocket and Attach Addon.
-
After attaching the URL, we can use the web terminal that is connected to the docker container
Connecting to docker containers on EC2 instances:
We can also connect the web terminal to a Docker container running on a server like an EC2 instance by allowing the necessary ports for TCP traffic in the security group. A service like Socat must be running in the background to redirect TCP traffic to the Docker socket in EC2. Finally, we need to construct the WebSocket URL using the public IP address of the EC2 instance and add the endpoint to the xterm instance on the frontend.
Once done, the WebSocket endpoint will look like this and can be attached to xterm.

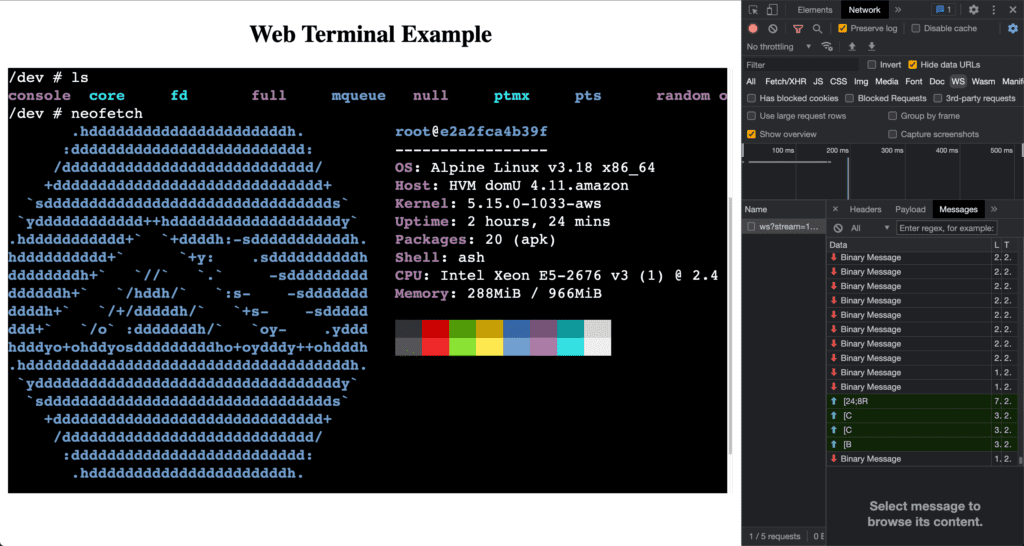 A web terminal connected to a docker instance running in EC2
Once we connect the web terminal to a remote container running on a server, we can execute commands such as “ls” or “neofetch”, and the output will be returned to the web terminal. Additionally, we can enhance security by establishing a secure WebSocket connection (WSS) using a secure SSL connection to provide encryption in transit. However, this is just the starting point. With further customization and configuration, we can build a web-based terminal that is fully featured.
References:
https://xtermjs.org/docs/api/addons/attach/
https://docs.docker.com/engine/api/v1.41/#operation/ContainerAttachWebsocket
https://github.com/docker/for-mac/issues/1662
https://forums.docker.com/t/how-to-access-docker-tcp-socket/8330/2